Embark on a Photoshop journey with our photo editor as we unveil straightforward techniques for eliminating skin blemishes and imperfections. Whether you’re working on original images, portraits, or passport photos, the aim is to achieve a smoother, blemish-free face devoid of pimples and wrinkles. These user-friendly steps cater to both novice photographers and professionals, ensuring your photos maintain natural skin tones and a polished, professional appearance. Learn how to effectively remove skin blemishes in Photoshop through simple yet impactful methods.
What is Blemishes Skin:
Blemished skin refers to skin that has imperfections, irregularities, or discolorations. These imperfections can be caused by various factors, including genetics, hormonal changes, sun exposure, aging, and skin conditions. Skin blemishes can manifest in different forms, and here are some common types:
Acne:
- Pimples: Inflamed, pus-filled lesions that occur when hair follicles are clogged with oil and dead skin cells.
- Whiteheads and Blackheads: Non-inflammatory types of acne, characterized by clogged pores. Whiteheads are closed, while blackheads are open and exposed to air.
Hyperpigmentation:
- Dark Spots: Result from an overproduction of melanin, often caused by sun exposure, inflammation, or injury.
- Melasma: Patches of dark skin that commonly occur on the face, triggered by hormonal changes, such as pregnancy or birth control use.
Rosacea:
- Redness and Flushing: Chronic condition causing facial redness, visible blood vessels, and sometimes small, red bumps.
Eczema:
- Dry, Flaky Skin: Inflammatory skin condition causing redness, itching, and the development of dry, scaly patches.
Freckles:
- Small, Brown Spots: Often genetically determined, freckles are clusters of concentrated melanin triggered by sun exposure.
Age Spots or Liver Spots:
- Dark Spots: Develop as a result of aging, usually appearing on areas exposed to the sun over the years.
Birthmarks:
- Congenital Marks: Present at birth, these can vary widely in size, color, and appearance.
Scars:
- Raised or Depressed Marks: Result from the healing process after wounds, injuries, or surgical procedures.
Stretch Marks:
- Linear Marks: Often occur due to rapid weight gain, growth, or pregnancy, resulting in the stretching of the skin.
Broken Blood Vessels:
- Visible Red or Blue Lines: Can appear on the face due to aging, sun damage, or skin trauma.
Uneven Skin Texture:
- Rough or Bumpy Skin: Caused by factors such as dryness, dehydration, or the build-up of dead skin cells.
Managing blemished skin involves a combination of good skincare practices, protecting the skin from the sun, and, in some cases, seeking professional dermatological advice for specific conditions. It’s important to note that some blemishes are temporary, while others may require ongoing care to maintain skin health and appearance.
Now that we understand the different types of blemishes, let’s move on to how to fix and remove them in Adobe Photoshop.
Video Tutorial of this photo’s Blemishes Removal:
Lets discuss about How to Remove Blemishes in Photoshop now:
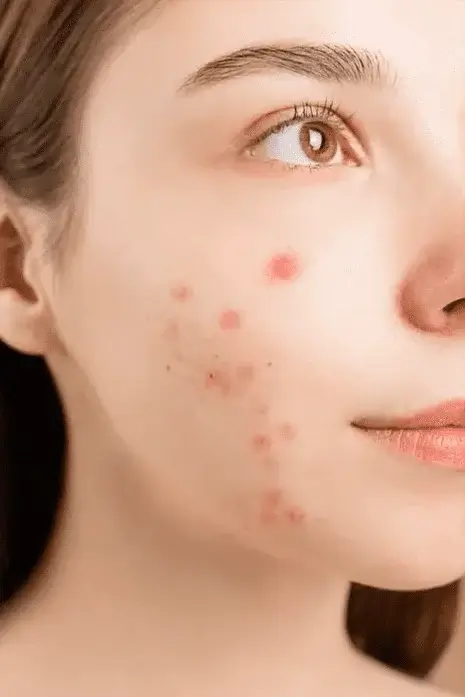
Step 1: We select the image:
We open the image we want to retouch in Photoshop. If you want to practice, I recommend you find an image on one of these free image sites like Unsplash, Pexels, Stocksnap, stockSnap.io
or you can use this one used in this tutorial:
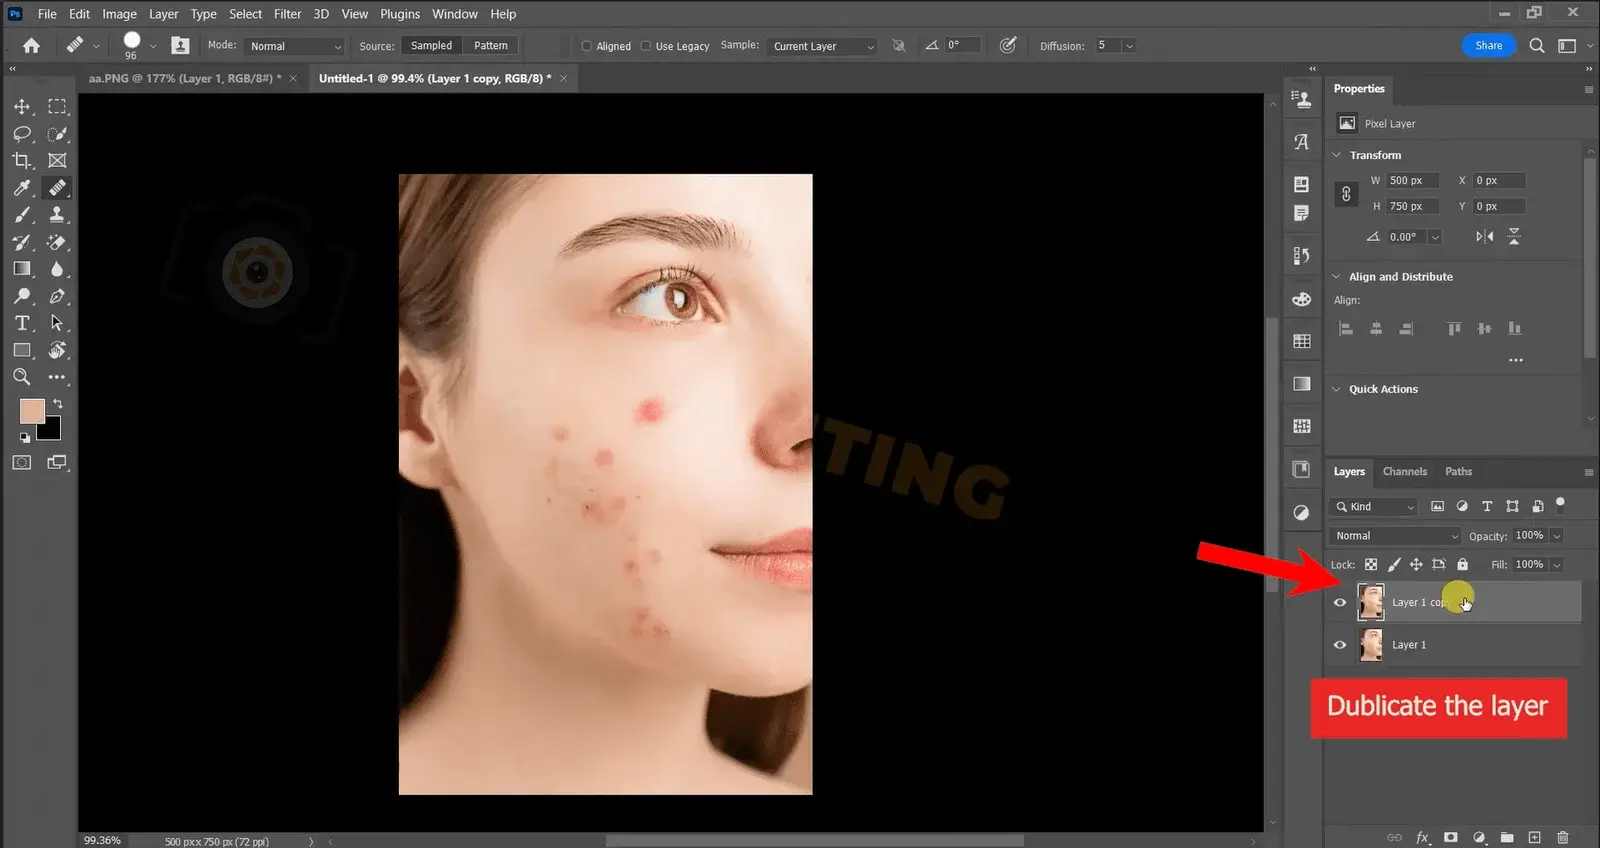
The first thing we will do is duplicate the layer of our image with Layer > Duplicate Layer > Ok . So we’ll be working with the top layer so we always know what we’re removing by looking at the bottom layer.
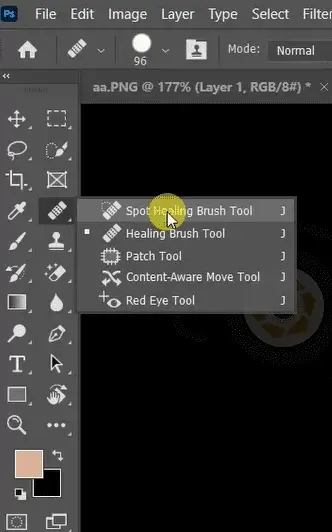
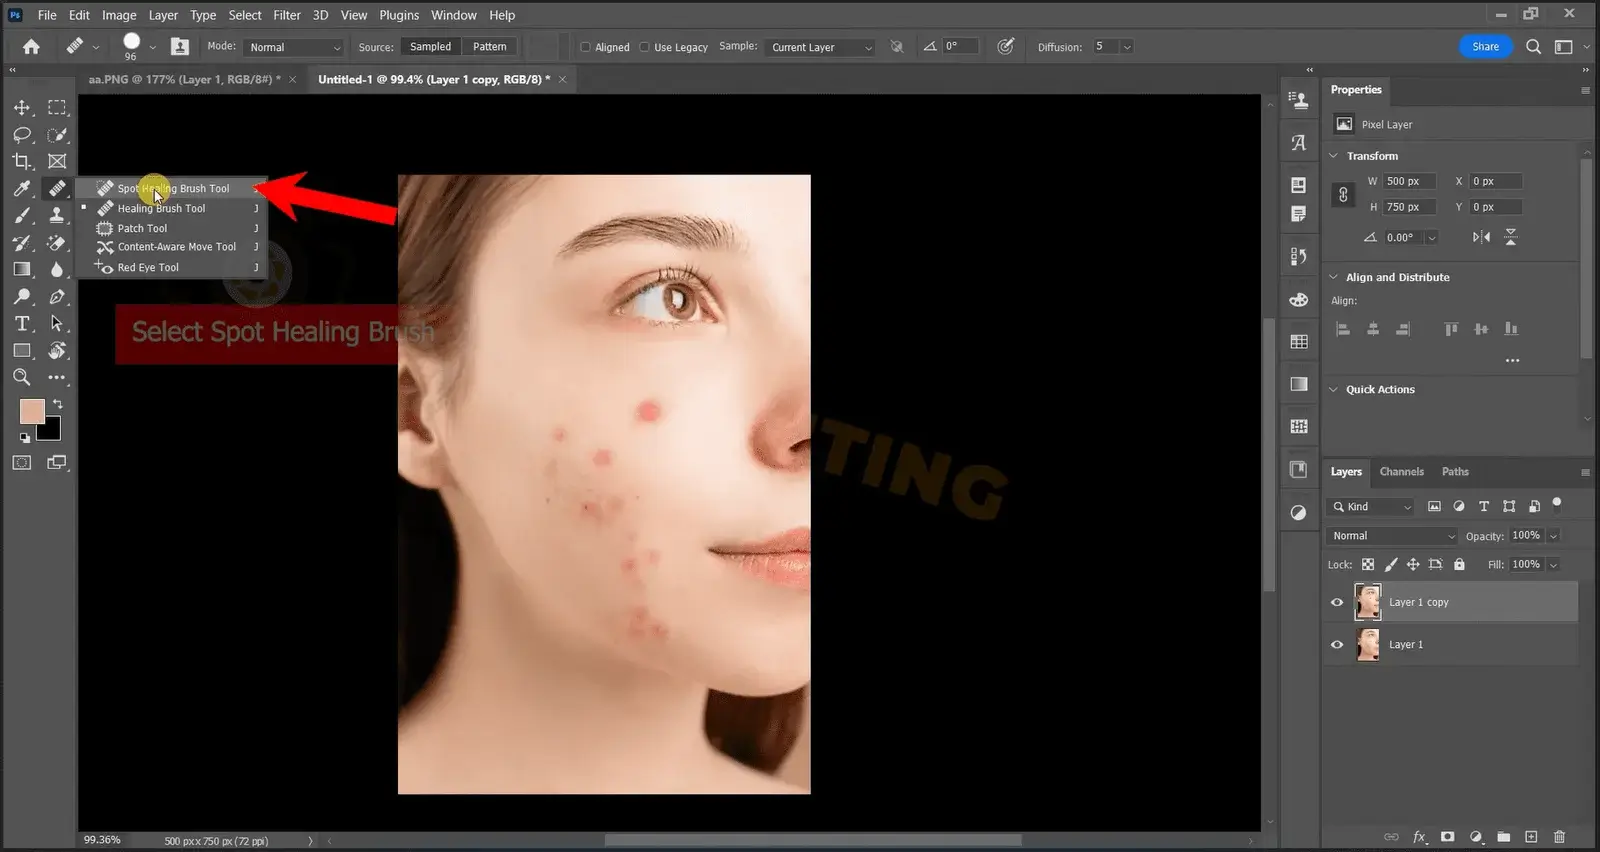
Step 2: Spot Healing Brush Tool to Remove Acne:
Now, we need to select the Spot Healing Brush tool. This is the tool that will allow us to remove and eliminate any punctual imperfection / Blemishes in our images.
Now, depending on the size of our image, we are going to select the size of our correction brush in the upper bar. In this case, a size of 9 is being used because it is accurate to the size of the grains.
Photoshop Tool to remove acne pimples and blemishes from the face with Photoshop Also, you have 3 options to choose the type of correction: Proximity Blending, Texture Creation, Content-aware. The easiest way to correct is with Content-Aware, because Photoshop takes into account the surrounding content in order to correct.
Then we will be giving small clicks on the acne pimples in the image to be able to correct them. The best thing is that we zoom in on the image to do it with greater precision. You can also click and drag the brush to correct larger wrinkles or imperfections.
Step 3: Imperfections, grains on the edges:
There may be types of blemishes or pimples that require the brush to be even smaller. You can change the size of the brush in the following window that is accessed from the top bar of the tool. Furthermore, you can change the shape of the brush with the two points shown in the following image . This is perfect for correcting acne pimples in areas near lines or edges.
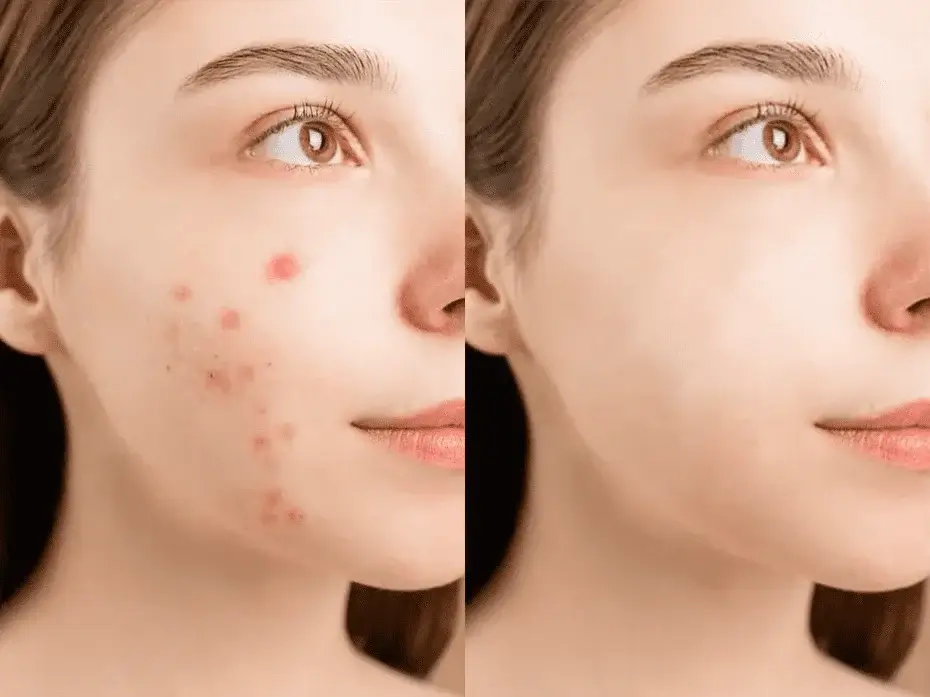
Final result: Face without Blemishes / Imperfections:
You should keep using the acne removal tool, and you can get a face without acne marks, as shown below:
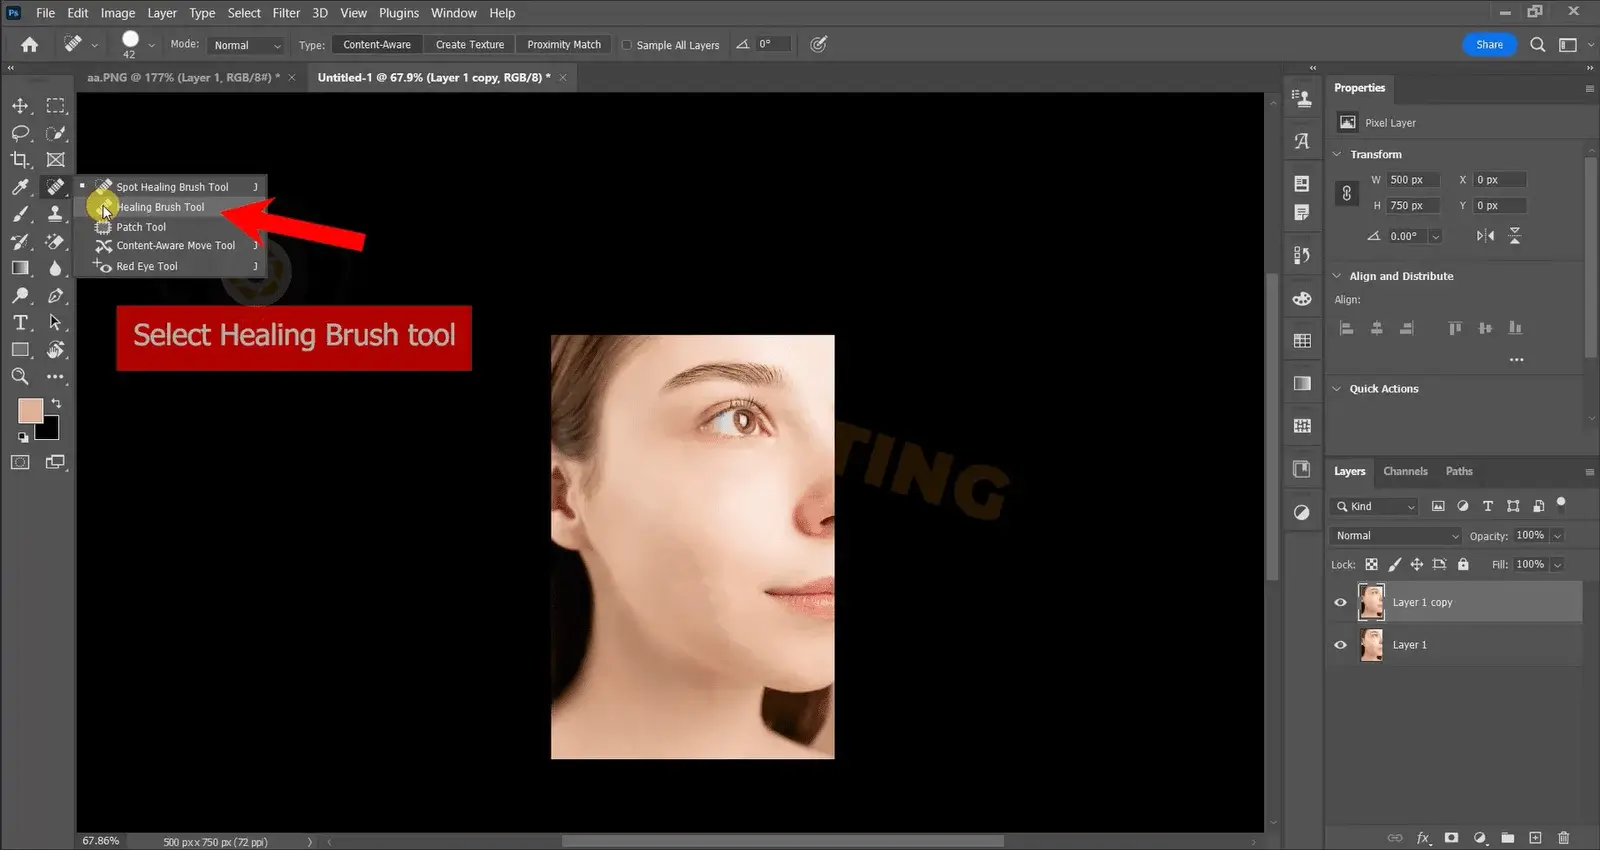
You should keep using the healing brush tool in photoshop, and you can get a face without acne marks.
In summary, when it comes to perfecting skin in an original image, Photoshop stands out as an incredibly powerful tool. Whether you’re addressing acne, scars, or other imperfections, this professional photo editor offers a range of simple techniques and tools for achieving flawless results. Utilizing the Spot Healing Brush, Patch Tool, or Clone Stamp Tool allows for the easy removal of unwanted blemishes while preserving the natural texture of the skin. Moreover, Photoshop provides more advanced options like Content-Aware Fill and Frequency Separation, enhancing the ability to retouch and blend skin tones seamlessly.
If it helped you, do appreciate our team at Photos Editing Services (PESs) and share it!


