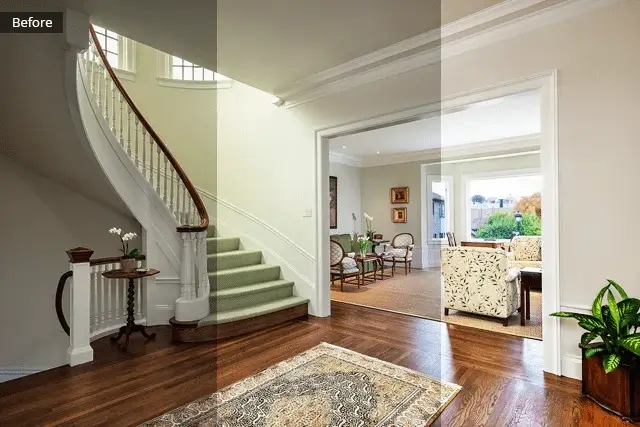
Effective property marketing hinges on the quality of real estate photography, where compelling images play a pivotal role. Despite the skills of seasoned real estate photographers and the utilization of natural light, certain imperfections in the images are unavoidable. Presenting these photos in their unaltered state to potential buyers may not yield the desired impact. Fortunately, adept real estate photo editors employ powerful tools such as Adobe Photoshop and Adobe Lightroom to address issues ranging from color discrepancies to the removal of unwanted elements. Whether it involves refining white balance, retouching skies, and lawns, or employing advanced photo editing techniques, these professionals can transform an original photo into a stunning, professional image that showcases property photos at their best. In this article, we’ll delve into five easy and effective real estate photography editing tips to elevate your property images.
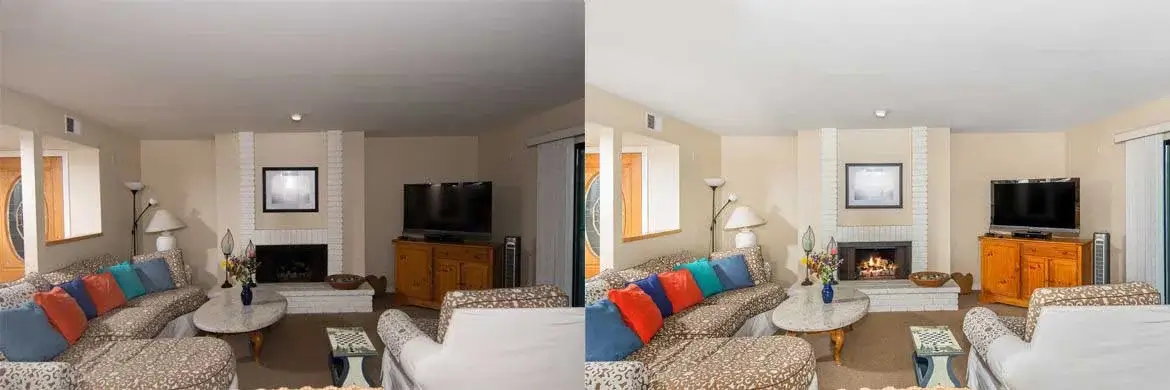
Exterior photos brightening:
Daytime pictures can turn out dark and dull due to shadows. Follow these simple steps to enhance your real estate photos.
- Go to “Windows – Actions”. The “Action” dialogue box will open or it may appear as an arrow on the sidebar so expand it. Go to “Actions – Tutorial Actions – Single Extensor max DR – Play icon”. Click “Play” 3 times and 3 layers will be created (besides the “Background” layer already present), each brightening the image more. Each layer will be shown on the side bar so if you want to edit one, you can do it.
- Go to “History – Open”. It opens the original image again. Then, go again to the “Actions window – Tutorial Actions – Create new action icon”. In its dialogue box, name it to differentiate it from the original and press “Record”.
- Make a duplicate layer (Ctrl/Cmd+J); make sure that “Actions” was selected. Now with the duplicate layer automatically selected, go to “Filter – Camera Raw Filter”. In it, increase the “Shadows” to “100%” by moving its slider to the right. It brightens the image. Press “OK”.
- Duplicate the copy layer (Ctrl/Cmd+J). Then, go again to “Filter – Camera Raw Filter” and increase the “Shadows” to “100%” by moving its slider to the right, thus increasing the “Shadows” by “200%” and brightening the image more.
- Proceeding, duplicate this layer (Ctrl/Cmd+J). Again “Filter – Camera Raw Filter”. In its dialogue box, increase or decrease the “Exposure”, “Contrast”, “Highlights” (dropping “highlights” makes the sky bluer), “Shadows”, “Blacks”, “Whites”, “Vibrance”, “Saturation” as required. This step of real estate image editing further refines the color and makes the picture top quality.
- Press “OK” and stop the “Action” from recording by pressing the “Stop” icon at the end of the “Actions” dialogue box. Once done, save this image.
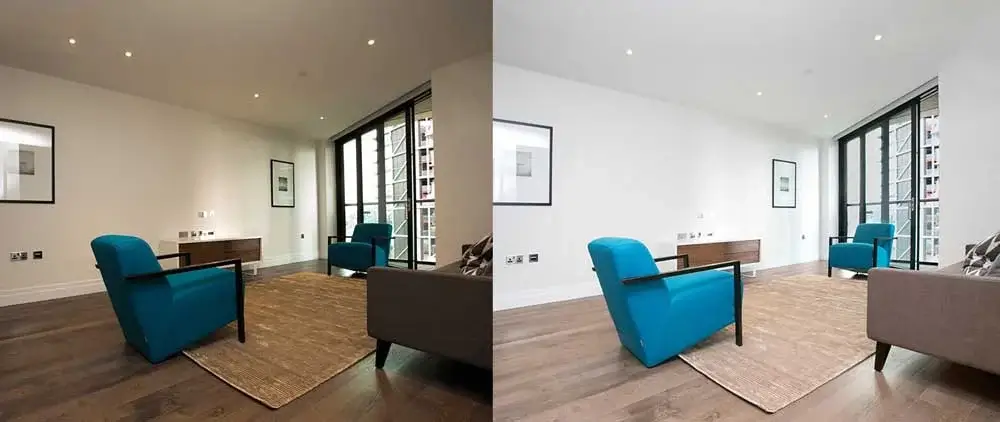
Interior Photos Color Correction:
When taking interior photos, all types of lights (the chandelier, the tungsten lamps, LED lights) are turned on to take bright photos, but it ends up casting orange hues in the images. Our Real estate photo editing services, therefore, fix these colors to get a cleaner result.
- Make a duplicate layer (Ctrl/Cmd+J).
- From the ”Adjustment Layer”, go to:
- Curves – select the second eye dropper tool (the gray color point) and 90% of the color will be adjusted. If you want to adjust individual colors (red, blue, green), select that color in “Channel” and adjust the color accordingly by moving the curve. Once done, hit “OK”.
- Hues/Saturation – slide the sliders of “Hue”, “Saturation” and “Lightness” as needed. On “Edit”, select any color you want to individually adjust and do it accordingly. It flawlessly enhances the colors during real estate retouching.
- Group these layers together (Ctrl/Cmd+G) and name them to differentiate them from the other layers.
Sky Replacement:
The sky plays an important role in real estate pictures. Use the “Sky Replacement” tool to add a sky and enhance the beauty of the photographs.
- Go to “Edit” – Sky Replacement”. A “Sky Replacement” dialogue box opens up and it is already inserting a default sky image in your photo, though more options are available. Click the dropdown arrow of the ‘sky’ shown in the dialogue box and insert a ‘sky’ of your choice.
- Rectify the ‘sky’ through “Sky Adjustment” in the dialogue box:
- Move the sliders of “Brightness” and “Temperature” as needed.
- Increase or decrease the “Scale” of the sky image if it does not cover the whole picture or go out of it.
- With the “Move” tool, you can move the ‘sky’ and position it however you like. Just make sure it is filling your entire picture and does not look unnatural.
- The “Flip” icon will flip the ‘sky’ horizontally. If the shadows in your picture and the sun in the ‘sky’ do not align, use this tool to flip the ‘sky’ and the sun will be hidden.
- “Shift Edge” – the edges of the objects in the picture tend to become overshadowed by the ‘sky’ so sliding the slider of “Shift Edge” to the right will lessen the impact of the ‘sky’s’ color and make the edges and object stand out more.
- Sliding the slider of the “Fade Edge” right is used to fade the sharp edges between the foreground picture and the ‘sky’, thus blending them.
Foreground Adjustments:
- “Lightning Adjustment” brightens or dims the lightness of the foreground picture as needed to match the ‘sky’.
- “Color Adjustment” adjusts the color of the foreground as needed.
- Go to “Output To New Layer” – it will send this layer to a new layer which will include all the adjustments you made. Since it will be a new layer, you can come back and make changes if you wish.
- The “Brush” tool adds or removes the ‘sky’ wherever needed in the foreground image. Select the “Brush” tool and use the “+” and “-” tools to paint in any area where the ‘sky’ is missing or brush out the ‘sky’ color from the foreground picture. While using the “Brush” tool, make sure “Mode: Normal” is selected.
- Hit “OK” once done and you will see in the sidebar that in the “Layers” panel, there will be a “Sky Replacement Group” layer which you can expand and see the adjustments that were made will be shown. You can click on them and edit them if you wish. There is also “Layer Mask Thumbnail” where you can go: click on it, select a brush, keep “Flow: 8%”, go to “Mode: Overlay” and refine the edges as you fit.
Lawn Retouching:
Scarce grass in the lawn can be extremely off-putting in pictures. Adding it during real estate photo editing will, therefore, give pictures that extra invigorating vibrancy that no one can take their eyes off.
- Open a grass image (taken from Google or your shot) in Adobe Photoshop.
- In the “Layers” panel in the sidebar, it will be labeled as “Background” so double-click on it and a dialogue box will open showing “Name: Layer 0”. Hit “OK” and it will be turned into a layer.
- Select this “Layer 0”, and cut and paste it (using Ctrl/Cmd) on the picture where you want it. Shrink it to fit in your picture’s ‘lawn’.
- Once the grass image is in position, select “layer 0” in the sidebar and put a “Layer Mask” on it. Then, use “Ctrl/Cmd+I” to turn the “Mask” black; now you can’t see the grass image.
- Take a paintbrush (Ctrl+B); make sure to use a soft, round brush, keep “Hardness” at zero, and ensure that ‘white’ is selected (white on the black mask will show through). Make sure your “Mask” is selected, take a bigger brush, and paint the ‘lawn’ of your picture. Zoom in and get your brush size down to paint the edges.
These steps of real estate image editing will give the ‘grass’ an unnatural brightness so bring the “Opacity” down a bit to give the grass a natural, realistic look and to blend with the yellow ground.
Removing unwanted objects:
Any distraction can ruin the beauty. Our experts will remove the retouching following the guidelines.
- Duplicate the layer using “Ctrl/Cmd+J” or by right-clicking on the layer and selecting “Duplicate Layer”; a dialogue box will open. Name it, e.g. ‘Fill’, and hit “OK”.
- Right-click on this “Fill” layer and choose “Rasterize Layer”, making it a regular pixel picture that Photoshop can change.
- Zoom in (Ctrl/Cmd+Z) towards the object you wish to remove and click “Ctrl/Cmd+M” for the “rectangular mark key”. It will select your undesired object in a rectangular key. Or use the “Lasso” tool (Ctrl/Cmd+L) to make a boundary around your unwanted object.
- Go to “Edit menu – Content-Aware Fill”. The sidebar on the left is the Photoshop guidance for your selected area, and the green area around the object is the sample area provided by Photoshop, shown in the “Preview” window. The preview window shows the default result of replacing your object with anything in the sample area.
- To make a replaced area look natural in real estate retouching, turn on “Show Sampling Area” in the “Content Aware Fill” sidebar and click “reset” to use the default sampling option. Use the brush tool to remove the unwanted section. This will prevent Photoshop from sampling that area. Preview the result in the “Preview” window.
- Then to further refine the replaced area, select the “Lasso” tool or “Ctrl/Cmd+L”. Hold the “Alt/Option” key and you will get a “-” cursor. Then, simply remove any unwanted area, either from the green sampling area or the area around the unwanted object that you had selected using the “rectangular box key” or the “Lasso” tool.
- In the “File Settings”, there are “Color Adaptations” – use its options (None, Default, High, Very High) to see which color would fit best and select it.
Rotation Adaptation:
- “Rotation Adaptation” – it changes the angle of the selected area. You can use it when correcting texture, e.g., of rocks or ground. Explore its options (None, Low, Medium, High, Full) to find the best fit.
- “Scale” – turning it on helps typically where there are bricks on a low angle or something with a repeating pattern that is changing size in the picture, so if you have a picture with bricks in the foreground moving to very small bricks in the distance, this will help with cloning across that.
- “Near” – great for things like reflection or where you are fixing the right-hand side of the column by sourcing through the left-hand side of another column. Just select “Near” and it will be flipped.
- Now output it. In the “Output” option, there are “Current Layer” (it will save the changes on the layer you are working on), “New Layer” (it will create a new layer containing your adjustments), and “Duplicate Layer” (it will create a copy layer and fill that). “Current Layer” and “Duplicate Layer” make your file size bigger so “New Layer” is best.
- Click “OK” and your changes will be put on their separate layer. Select the layer (Ctrl/Cmd+D) and you have your results. You can further refine it if necessary using the “Spot Healing Brush” tool or the “Clone Stamp Tool”.
In the end, you will be amazed by the results – Our real estate photo editing experts will have turned the once dull picture into one that will be brimming with vibrant colors without any unpleasant objects taking away its beauty. Checkout our Photo Editing Sample here