In the ever-evolving landscape of digital photography, Apple’s Live Photos have emerged as a captivating feature that brings static images to life. If you’re pondering how to edit a Live Photo, the process is surprisingly straightforward, allowing you to tweak and refine these animated snapshots effortlessly. This article delves into the complete history of Live Photos, exploring their inception, evolution, and the impact they’ve had on the way we capture and relive our cherished moments.
The Genesis of Live Photos
The concept of Live Photos was introduced by Apple in September 2015 with the unveiling of the iPhone 6s and iPhone 6s Plus. Touted as a revolutionary feature, Live Photos aimed to add an extra layer of depth and emotion to traditional still photography. The premise was simple yet innovative – capture a few seconds of video and audio before and after taking a photo, turning static images into dynamic memories.
Evolution and Technological Marvel
Incorporating 3D Touch:
One of the key technologies that enabled Live Photos was Apple’s introduction of 3D Touch. This pressure-sensitive technology allowed users to interact with their devices in a more nuanced way. In the context of Live Photos, 3D Touch played a crucial role in animating the captured moments with a gentle press on the screen.
Integration with iOS:
Live Photos seamlessly integrated with the iOS ecosystem, enabling users to view and interact with their animated memories across various Apple devices. From iPhones to iPads and Macs, the continuity of the Live Photos experience became a testament to Apple’s commitment to a cohesive user experience.
Key Photo Feature:
As Live Photos evolved, Apple introduced the Key Photo feature, allowing users to choose a specific frame from the animated sequence as the main still image. This added a level of customization, allowing individuals to curate the visual narrative of their captured moments.
The Impact on Photography and Social Sharing
Enhanced Storytelling:
Live Photos revolutionized the way we tell stories through images. Instead of freezing a single moment in time, users could now encapsulate the essence of a moment – the laughter that preceded a smile, the rustling of leaves before a serene landscape, or the excitement leading up to a pose.
Dynamic Social Sharing:
When shared with others using compatible devices, Live Photos retained their dynamic nature, providing a more immersive viewing experience. Social platforms adapted to this technology, allowing users to share and view Live Photos on platforms like iMessage, Facebook, and Instagram.
Challenges and Adaptation
Storage Considerations:
The introduction of Live Photos brought about new challenges, particularly concerning storage. The dynamic nature of Live Photos meant they occupied more space than traditional still images. This prompted users to be mindful of their device’s storage capacity and make conscious decisions about which moments deserved the Live Photo treatment, including how to edit a Live Photo.
Compatibility Beyond Apple:
While Live Photos seamlessly integrated within the Apple ecosystem, sharing the dynamic experience with non-Apple users presented some limitations. The challenge lay in ensuring that the essence of Live Photos transcended the boundaries of Apple devices and platforms.
Future Innovations and Beyond
As technology continues to advance, Live Photos are likely to undergo further refinements and innovations. With each iOS update, Apple introduces enhancements and features to augment the Live Photos experience, keeping it relevant and engaging for users seeking to capture and share their memories in a dynamic and interactive way. Users can also explore editing options within the Photos app, including the ability to adjust the background of photos directly on your iPhones, adding another layer of customization and creativity to their captured moments.
How to take a Live Photo
Taking a Live Photo on an iPhone is a simple and enjoyable process. Here’s a step-by-step guide to capturing a Live Photo:
Open the Camera App
Unlock your iPhone and locate the Camera app on your home screen. Tap on the Camera icon to open the app.
Activate Live Photo Mode
On the Camera app, find the Live Photo icon. It looks like a series of concentric circles at the top of the screen. Ensure that the Live Photo icon is highlighted, indicating that Live Photo mode is active. If the icon is yellow, it means Live Photo is turned on.
Choose Your Scene
Frame the shot you want to capture as a Live Photo. Consider the subject, background, and overall composition. Live Photos work particularly well for dynamic scenes or moments with movement.
Capture the Live Photo
Press the shutter button to take the photo. While doing so, keep in mind that Live Photos record a few seconds of video and audio before and after the actual photo is taken. Ensure that you hold the camera steady during this time to capture the complete moment.
View Your Live Photo
After capturing the Live Photo, you can view it by tapping on the thumbnail that appears at the bottom left corner of the camera screen. This thumbnail is a preview of the Live Photo you just took.
Interact with Your Live Photo
To experience the full effect of a Live Photo, press and hold on the photo in the Photos app or your camera roll. The Live Photo will come to life, showing the moments just before and after the photo was taken, complete with sound.
Choose Key Photo (Optional)
If you want to set a specific frame from the Live Photo as the main still image, open the Live Photo, tap “Edit” at the top-right corner, and use the slider to choose the desired key photo. Tap “Make Key Photo” to save your selection.
Share Your Live Photo
You can share your Live Photo just like any other photo. When sending through iMessage or sharing on social media, the recipient will experience the dynamic nature of the Live Photo if they are using a compatible device.
Disable Live Photo Mode (Optional)
If you want to turn off Live Photo mode, go back to the Camera app, tap the Live Photo icon to deactivate it (the icon will turn white), and proceed with capturing standard still photos.
Congratulations! You’ve successfully taken a Live Photo on your iPhone. Remember that Live Photos add an interactive and dynamic element to your captured moments, offering a more immersive way to relive and share your memories.
Editing Live Photos on iPhone
Live Photos, introduced by Apple, infuse a dynamic essence into your still images, capturing moments in a way that traditional photos cannot. Editing a Live Photo on your iPhone, including how to edit a live photo, enhances these captured moments, offering a creative space to personalize and refine each frame. In this detailed guide, we will walk you through the step-by-step process for editing Live Photos on your iPhone.
Open the Photos App
Unlock your iPhone and navigate to the Photos app, usually found on your home screen. Tap the app icon to open it, granting you access to your entire photo library.
Locate the Live Photo
Scroll through your extensive photo library to find the Live Photo you want to edit. Once identified, tap on the Live Photo to open it in full-screen mode.
Enter Edit Mode
In the top-right corner of the screen, locate and tap the “Edit” button. This action will transition you into the editing mode, where a suite of tools awaits to enhance your Live Photo.
Explore Live Photo Effects
Swipe up on the Live Photo to unveil a set of dynamic effects – Loop, Bounce, and Long Exposure. These effects can fundamentally transform the visual experience of your Live Photo. Experiment with each effect to discern which one best complements the narrative of your captured moment.
Crop and Straighten
Tap on the crop icon, identifiable by overlapping squares, to access the cropping tool. Adjust the framing of your Live Photo by dragging the corners or edges of the frame. This feature is useful for focusing on specific elements or ensuring a leveled horizon.
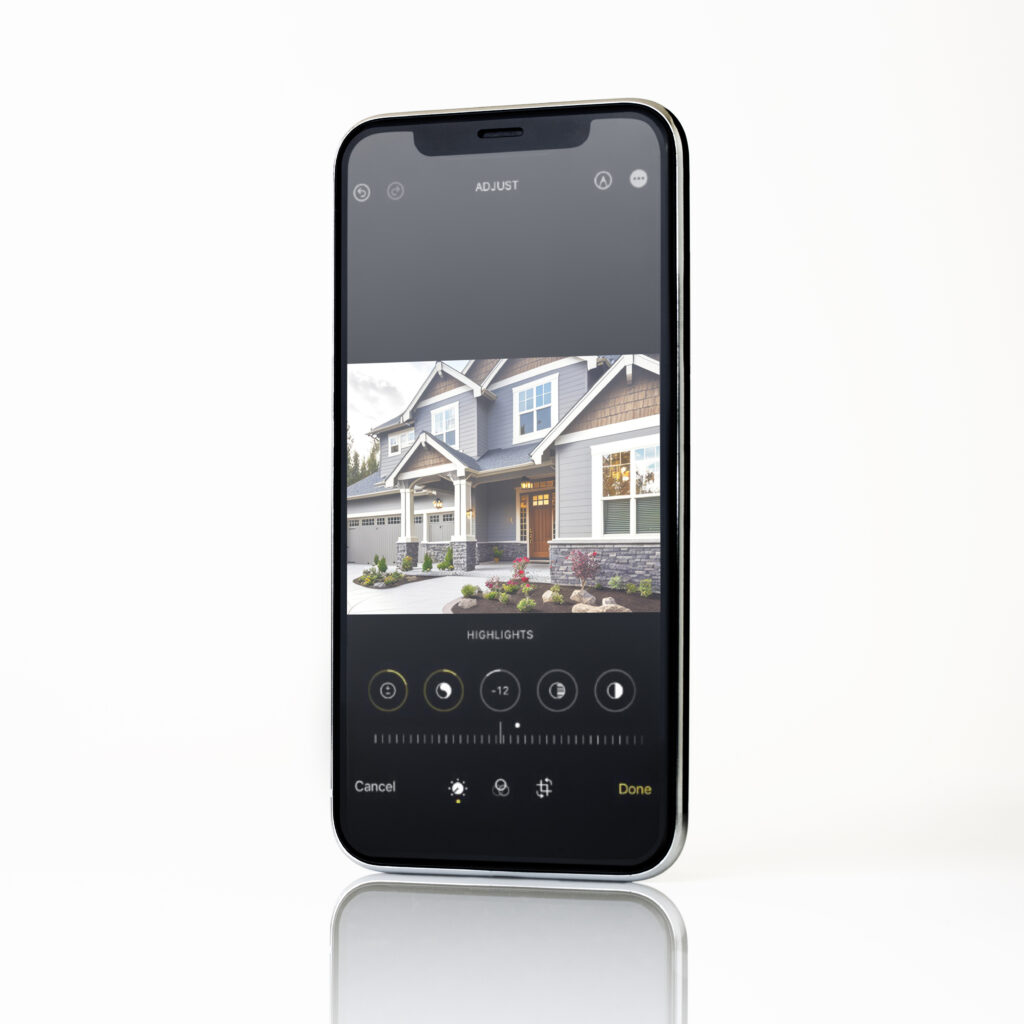
Adjust Lighting and Color
Navigate to the “Adjust” option, typically represented by sliders. Fine-tune the lighting and color settings of your Live Photo by experimenting with the brightness, contrast, and saturation sliders. This step allows you to achieve the desired visual impact.
Apply Filters
Explore the diverse range of filters by tapping on the filter icon. Apple provides a selection of filters that can add different moods and tones to your Live Photo. Swipe through the options and select the filter that enhances the overall atmosphere of your captured moment.
Add Text and Markup (Optional)
Tap on the “+” icon to access additional features, including the ability to add text or markup directly onto your Live Photo. While optional, this step enables personalization, such as adding captions, dates, or creative annotations to enrich the storytelling aspect.
Preview Your Edits
Before finalizing your creative enhancements, take a moment to preview the changes. Long-press on the Live Photo to see how the applied effects, adjustments, and filters come together. This interactive preview ensures that your edits align seamlessly with the intended mood and narrative of the moment.
Save Your Edits
Once satisfied with your creative enhancements, tap “Done” located in the bottom-right corner to save your edited Live Photo. Your masterpiece is now ready to be shared, enjoyed, and cherished across various platforms.
By following this detailed guide, you can navigate the editing process for Live Photos on your iPhone with confidence, transforming your moments into dynamic visual tales that resonate with emotion and narrative depth.
Editing Live Photos on Mac
Editing Live Photos on your macOS device provides an opportunity to enhance and personalize these animated memories. In this comprehensive guide, we will explore the step-by-step process for editing Live Photos on macOS, ensuring that you can unleash the full potential of this innovative feature.
Open the Photos App on Your Mac
Begin your editing journey by launching the Photos app on your macOS device. Locate the app in your Applications folder or by using Spotlight search. Click on the app icon to open it, granting you access to your complete photo library.
Select the Live Photo
Scroll through your photo library to find the Live Photo you wish to edit. Once identified, click on the Live Photo to open it in full-screen mode within the Photos app.
Enter Edit Mode
In the top-right corner of the Photos app, you’ll find the “Edit” button. Click on it to enter the editing mode, where a variety of editing tools and features are available to enhance your Live Photo.
Explore Live Photo Effects
Similar to the iOS version, macOS also allows you to explore dynamic effects. Click on the “Live” button, usually found below the image, to reveal options such as Loop, Bounce, and Long Exposure. Experiment with these effects to bring a unique visual dimension to your Live Photo.
Crop and Straighten
Access the cropping tool by clicking on the “Crop” icon, typically represented by overlapping squares. Adjust the framing of your Live Photo by dragging the corners or edges of the frame. This feature is useful for focusing on specific elements or ensuring a leveled horizon.
Adjust Lighting and Color
Navigate to the “Adjust” option, often represented by sliders. Fine-tune the lighting and color settings of your Live Photo by experimenting with the brightness, contrast, and saturation sliders. This step allows you to achieve the desired visual impact on your macOS device.
Apply Filters
Click on the “Filters” icon to explore and apply various filters to your Live Photo. macOS provides a range of filters that can add different moods and tones to your image. Experiment with the filters to enhance the overall atmosphere of your captured moment.
Add Text and Markup (Optional)
For an optional personal touch, click on the “Add” button (+) to access features like adding text or markup directly onto your Live Photo. This allows for personalization, such as adding captions, dates, or creative annotations.
Preview Your Edits
Before finalizing your creative enhancements, take a moment to preview the changes. Click on the “Live” button to see how the applied effects, adjustments, and filters come together. This preview ensures that your edits align seamlessly with the intended mood and narrative of the moment.
Save Your Edits
Once satisfied with your creative enhancements, click “Done” in the top-right corner to save your edited Live Photo. Your masterpiece is now ready to be shared, enjoyed, and cherished on your macOS device.
Editing Live Photos on Windows
Apple’s Live Photos bring moments to life, but what if you’re a Windows user eager to dive into the world of Live Photo editing? While native support is limited, third-party tools open the door to creativity. In this comprehensive guide, we’ll explore the landscape of editing Live Photos on Windows, presenting you with software options and detailed step-by-step guides on how to edit a live photo.
QuickTime: The Viewer
QuickTime, primarily a media player, allows Windows users to view Live Photos. While lacking editing capabilities, it serves as a gateway for exploring the dynamic nature of Live Photos.
Step-by-Step Guide for QuickTime:
- Install QuickTime:
- Download QuickTime for Windows from the official Apple website.
- Run the installer and follow on-screen instructions to install QuickTime on your Windows PC.
- View Live Photos:
- Open QuickTime.
- Navigate to “File” and select “Open File.”
- Locate and open your Live Photo. QuickTime will play the Live Photo as a short video.
Cloud for Windows: Sync and Access
iCloud for Windows extends Apple’s ecosystem to Windows PCs. It lets you sync Live Photos from your iCloud Photo Library, making them accessible for viewing and basic organization.
Step-by-Step Guide for iCloud for Windows:
- Install iCloud for Windows:
- Download iCloud for Windows from the official Apple website.
- Run the installer and follow on-screen instructions to install iCloud on your Windows PC.
- Sync Live Photos:
- Open iCloud for Windows and sign in with your Apple ID.
- Enable the “Photos” option to sync your iCloud Photos to your Windows PC.
- Once synced, you can access Live Photos in the designated folder.
Joyoshare LivePhoto Converter: Converting Dynamism
Joyoshare LivePhoto Converter specializes in converting Live Photos to videos or GIFs. This tool enables you to alter the format for easier editing and sharing.
Step-by-Step Guide for Joyoshare LivePhoto Converter:
- Install Joyoshare LivePhoto Converter:
- Download and install Joyoshare LivePhoto Converter from the official website.
- Launch the software.
- Choose Output Format:
- Click on the “+” button to add your Live Photo.
- Select the output format (video or GIF).
- Click “Convert” to process the Live Photo into the selected format.
iMyFone Filme: Crafting Visual Stories
iMyFone Filme is a versatile video editing tool that supports Live Photos. Import Live Photos, edit them with various features, and export the final creation as a video file.
Step-by-Step Guide for iMyFone Filme:
- Install iMyFone Filme:
- Download and install iMyFone Filme from the official website.
- Open the software and create a new project.
- Import and Edit:
- Import your Live Photo into the timeline.
- Edit the Live Photo as needed, adding effects or trimming the video.
- Export the Project:
- Export the project as a video file.
Live Photo Converter: Streamlined Conversion
Live Photo Converter is a straightforward tool designed to convert Live Photos to videos. With a user-friendly interface, it provides a hassle-free solution for users looking to transition Live Photos into a more editable format.
Step-by-Step Guide for Live Photo Converter:
- Download Live Photo Converter:
- Locate a reputable source to download Live Photo Converter.
- Run the installer and follow on-screen instructions to install the software.
- Convert Live Photos:
- Open the Live Photo Converter.
- Add your Live Photos and choose the conversion format.
- Click “Convert” to transform Live Photos into videos.
In conclusion, while Windows may not offer native Live Photo editing tools, these third-party solutions open up a realm of possibilities. Whether you’re viewing, syncing, or transforming Live Photos, these tools cater to diverse needs, allowing Windows users to engage with the dynamic storytelling inherent in Live Photos. Experiment, create, and unveil the potential of your captured moments on the Windows platform.
Tips and Tricks for How to Edit a Live Photo
Experiment with Effects:
Don’t be afraid to try different effects like Loop, Bounce, or Long Exposure. They can add a unique dimension to your Live Photos.
Use Natural Lighting:
When capturing Live Photos, take advantage of natural lighting. It enhances the overall quality of your photos and makes editing more effective.
Maintain Originality:
While editing, strive to enhance the natural beauty of the Live Photo without losing its authenticity. Avoid over editing for a more genuine feel.
Sync Across Devices:
Take advantage of iCloud Photo Library to seamlessly sync your edited Live Photos across all your Apple devices.
Combine Live Photos:
Create a cohesive storytelling experience by combining Live Photos that capture different aspects of a single moment.
Embrace Third-Party Apps:
Explore third-party apps that offer additional editing features for Live Photos. These can provide a broader range of creative options.
Share the Dynamic Experience:
When sharing your Live Photos, ensure the recipient is using a compatible device to fully appreciate the dynamic nature of the media.
In conclusion, the world of Live Photos opens up a realm of creative possibilities. Whether you’re editing on your iPhone or Mac, these step-by-step guides and tips are designed to help you unleash the full potential of your Live Photos, turning ordinary moments into extraordinary memories.


