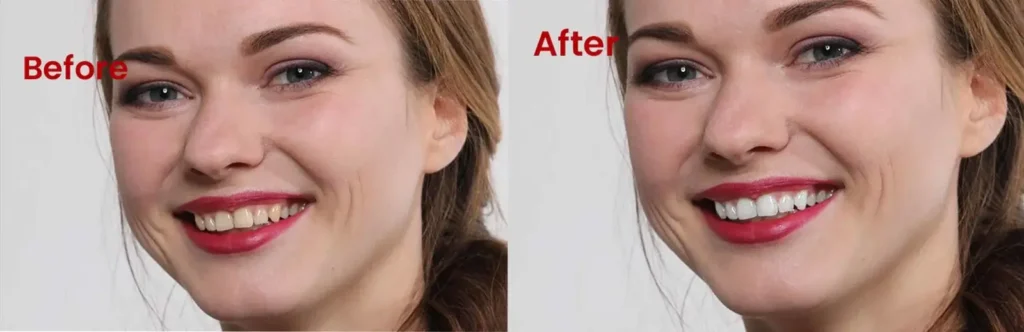
A dazzling smile can light up any image, but sometimes Mother Nature doesn’t quite cooperate. Enter the magic of Photoshop! Whether you’re enhancing professional portraits or perfecting family snapshots, Teeth Whitening in Photoshop offers a painless and precise way to unleash the brilliance of pearly whites. This guide will delve into the secrets of photo editing services for transforming dull smiles into radiant gems, so you can confidently present your most photogenic self in every click. Let’s ditch the filters and embrace the power of pixel-perfect perfection!
There are multiple ways to whiten teeth with Photoshop, so here we are going to see some of them, but this does not mean that they are the only ways to achieve it. Photoshop is a very extensive program that offers us many tools and ways to achieve the same effect.
Teeth Whitening Video Tutorial
By following these simple teeth whitening steps you can achieve a perfect smile easily and quickly.
Step 1: Go to the Adjustment Layer
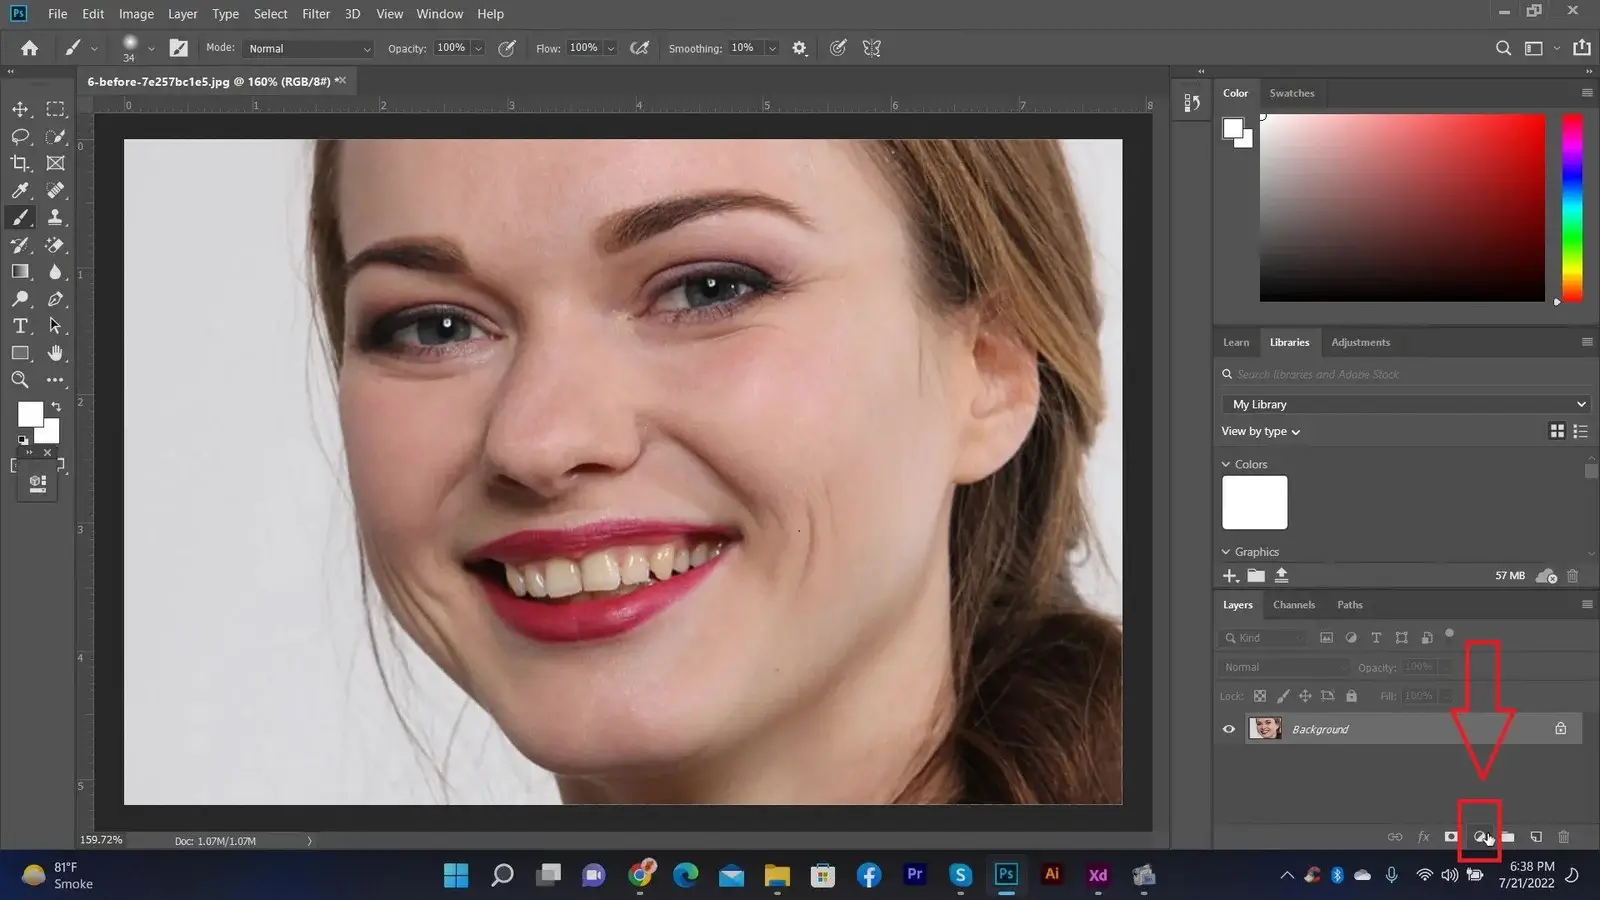
To initiate the process of enhancing your smile through teeth whitening in Photoshop. The initial step involves utilizing the Adjustment Layer feature. This robust tool empowers you to implement non-destructive edits to your image, granting a high degree of flexibility and precise control over the changes you make. The Adjustment Layer feature becomes pivotal in achieving optimal results while undertaking the teeth whitening process in Photoshop.
To find the Adjustment Layer options, navigate to the top menu bar in Photoshop. Here, you will see a tab labeled “Layer.” Click on this tab to reveal a drop-down menu. From the menu, select “New Adjustment Layer” and choose “Curves.”
Step 2: Select Hue/Saturation
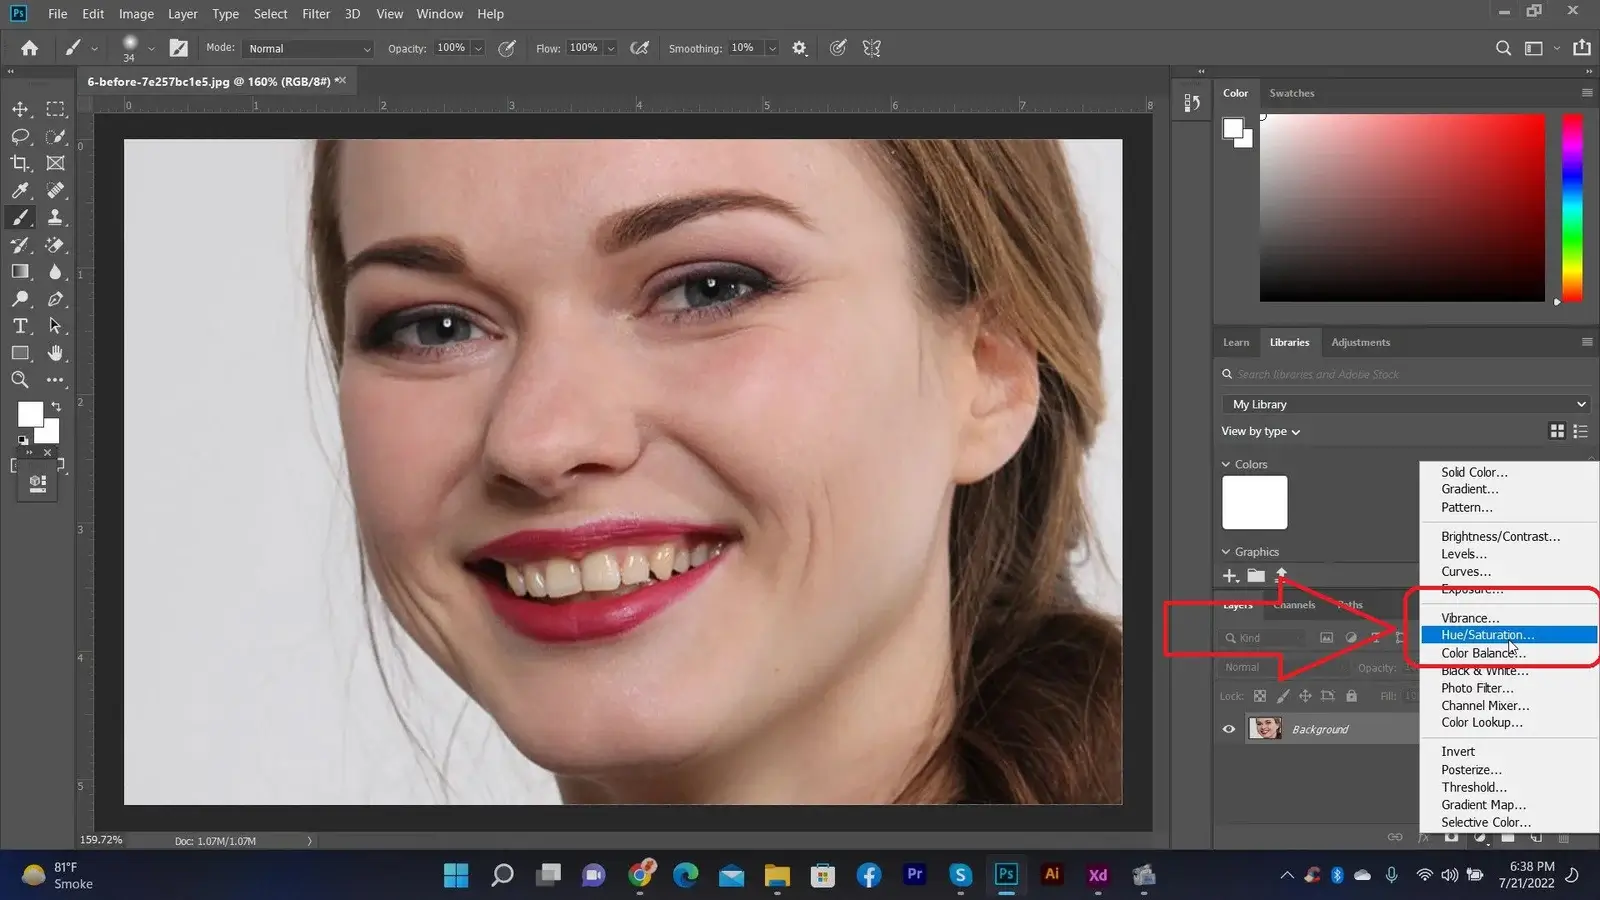
Once you open the image in Photoshop, the next step in whitening teeth is to select the ‘Hue/Saturation’ adjustment layer. This tool allows you to precisely control the colors and saturation in your image, making it ideal for adjusting the color of teeth.
To access the ‘Hue/Saturation’ adjustment layer, you can either go to the “Adjustments” panel and click on the “Hue/Saturation” icon, or you can go to the top menu bar and select “Layer,” then “New Adjustment Layer,” and choose “Hue/Saturation.”
Step 3: Now Pickup Yellow Color from Teeths

Once you have selected the teeth using the lasso tool as mentioned in step 2, it’s time to proceed to the next step of whitening teeth in Photoshop. In this step, you will be picking up the yellow color from the teeth for further adjustments.
Zoom in on the image: To get a closer look at the teeth, zoom in on the area where they are located.
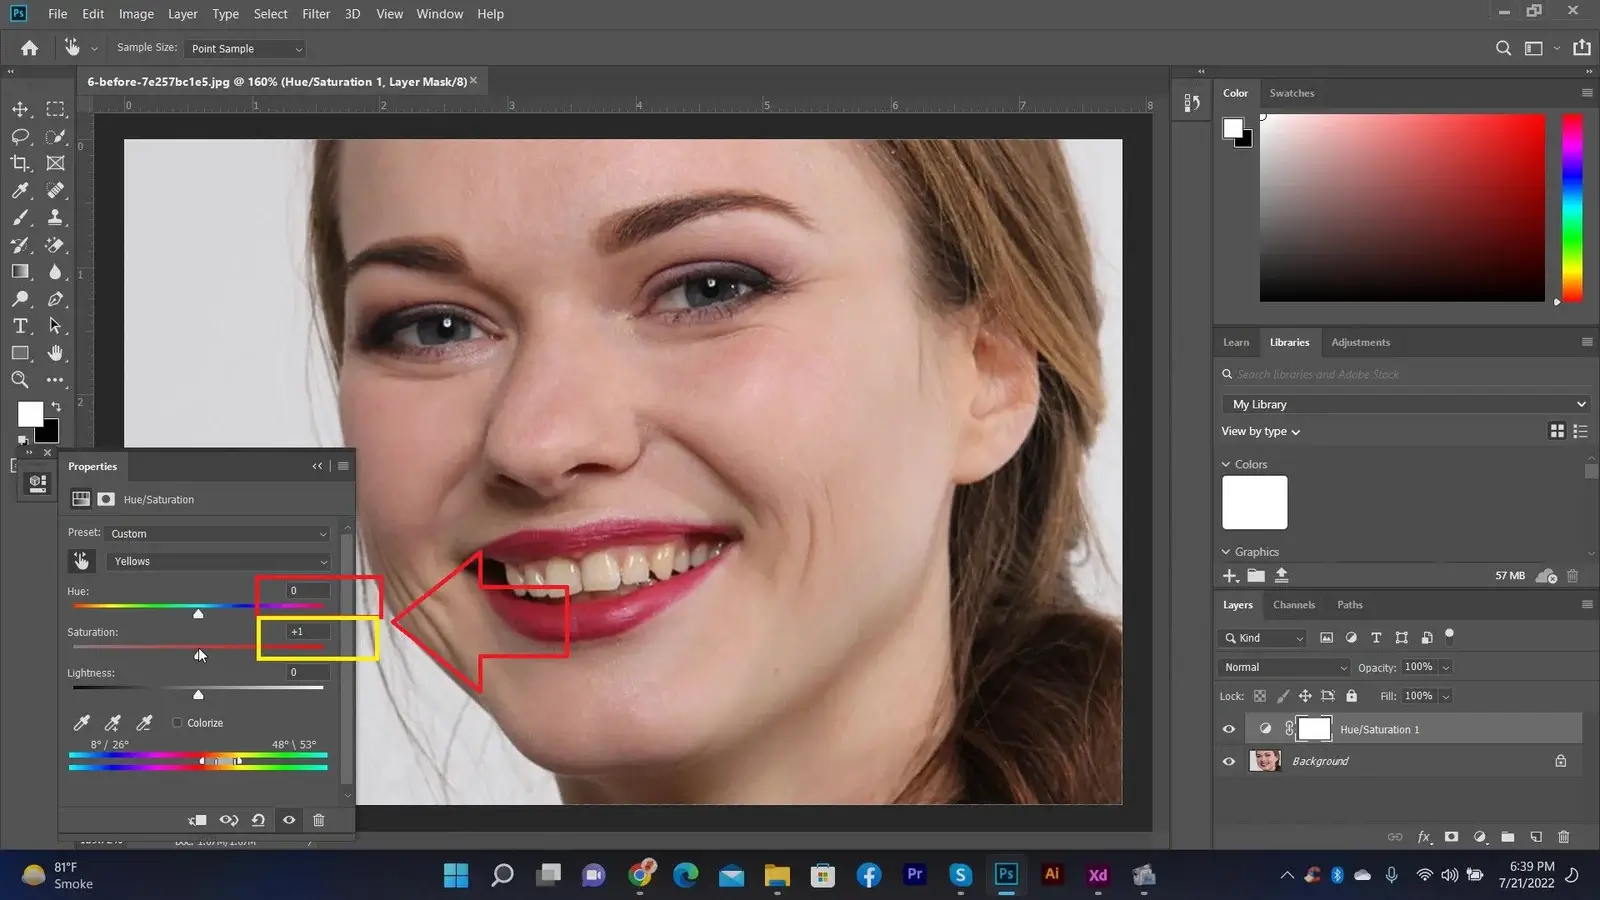
Step 4: Take hue and saturation at their Maximum
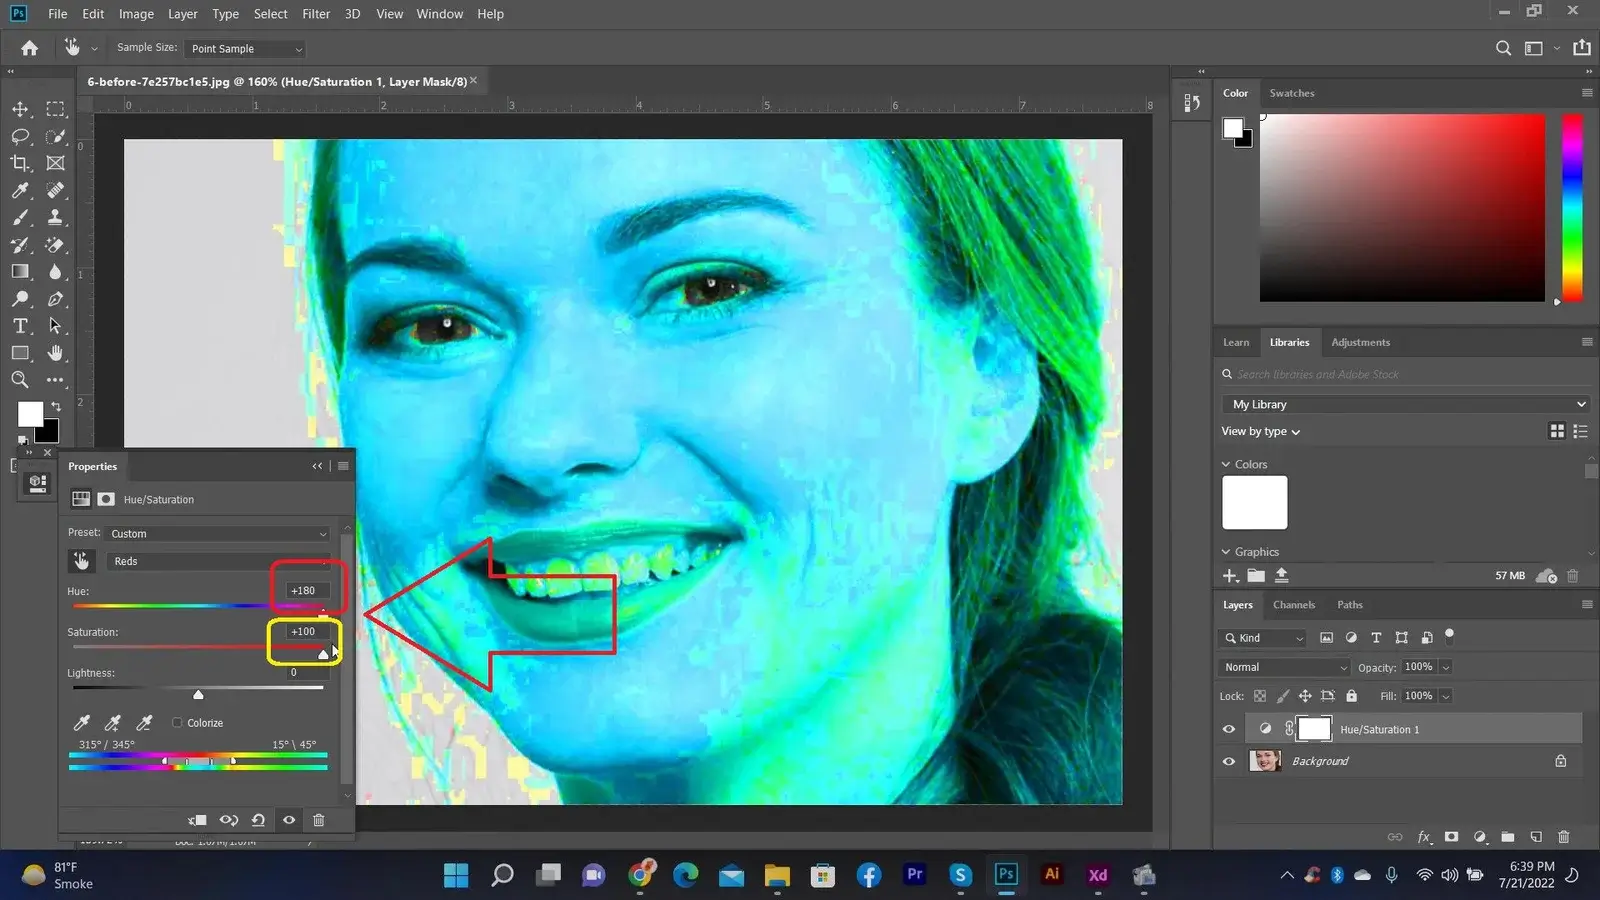
Once you have completed step 3 and brightened the teeth, it’s time to move on to step 4: taking hue and saturation at their maximum. This step will further enhance the whiteness of the teeth, making them appear even brighter and more dazzling.
To begin, make sure you have the layer with the teeth selected. You can do this by clicking on the layer in the Layers panel. Or by using the Move Tool to select the teeth directly on the image.
Next, go to the top menu bar and click on “Image,” then select “Adjustments” followed by “Hue/Saturation.” A dialog box will appear with sliders for adjusting hue, saturation, and lightness.
Drag the saturation slider to the right, which will increase the intensity of the colors in the image. Then, drag the hue slider slightly to the right to shift the colors towards a cooler tone, which will help counteract any yellow or orange tones in the teeth.
Step 5: Play with the Range to Select the Teeth
 In the previous steps of whitening teeth using Photoshop, we successfully created a duplicate layer, adjusted the levels to enhance the brightness, and used the brush tool to clean up any imperfections. Now, it’s time to move on to step 5: playing with the range to select the teeth.
Step 6: Return Hue and Saturation to Zero
We’ve made progress in whitening teeth with Photoshop by adjusting levels, enhancing brightness and contrast, and reducing yellow or stained appearance. Now, in step 6, we will learn how to return the hue and saturation to zero to achieve a natural look.
- Open your image in Photoshop and make sure you have selected the layer where you have adjusted the hue and saturation in step 4.
- Go to the top menu bar and click on “Image,” then select “Adjustments” followed by “Hue/Saturation.” A dialog box will appear with sliders for adjusting hue, saturation, and lightness.
- Drag the saturation slider to the left, which will desaturate the colors in the image and make them appear more natural. Then, drag the hue slider back to the center to return the colors to their original state.
Step 7: Increase Lightness to 100%
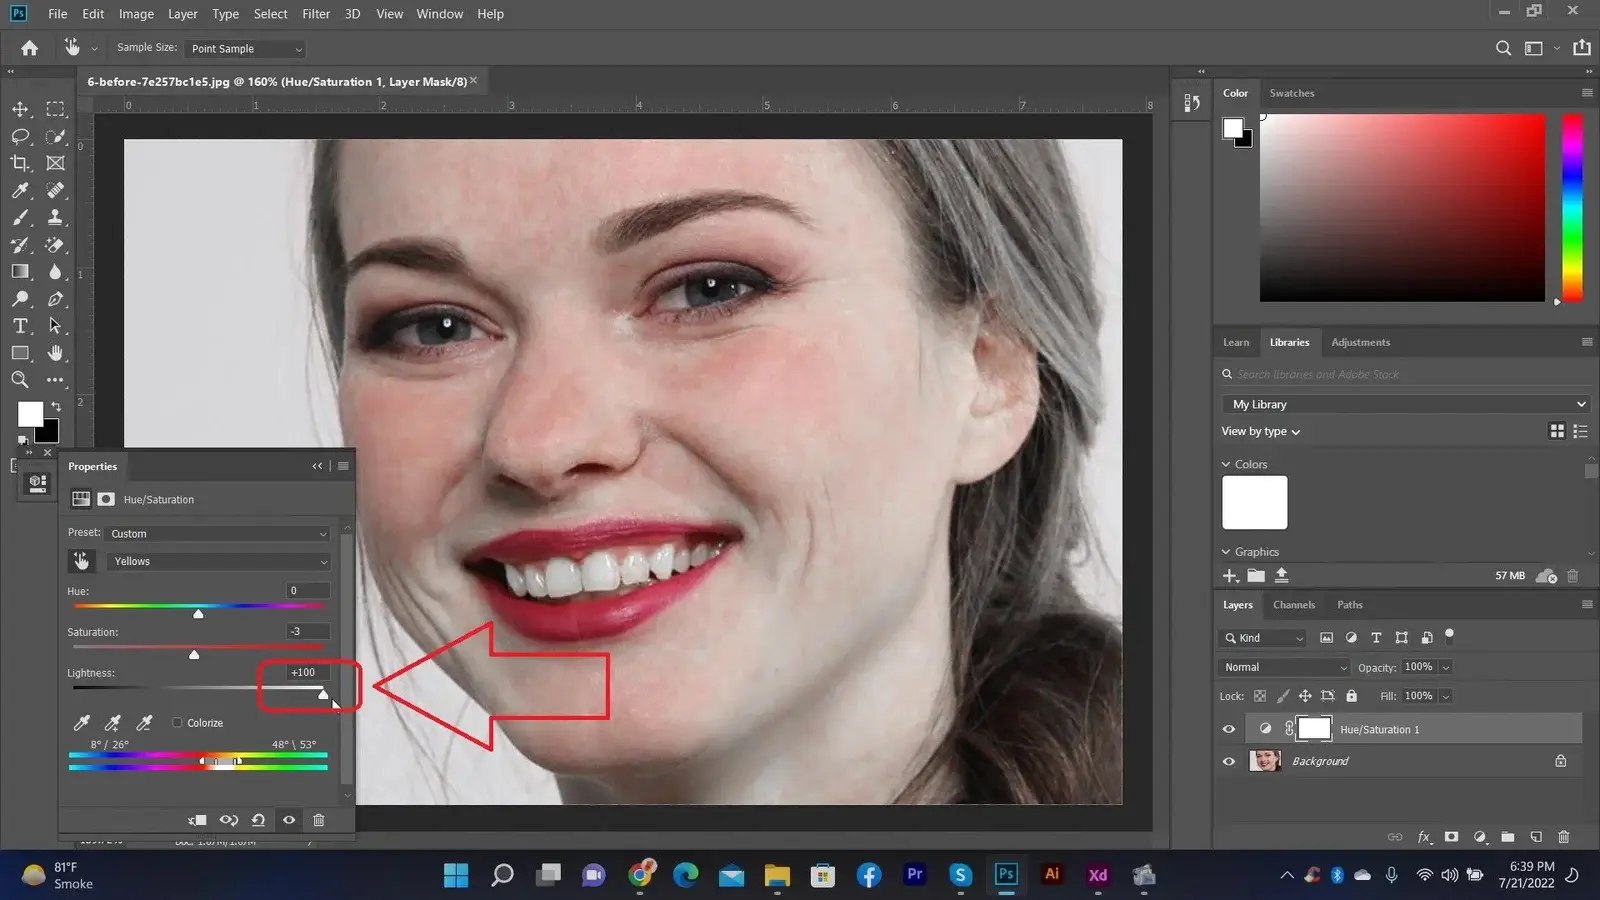
Once you have successfully selected and isolated the teeth in your image, it’s time to start enhancing their appearance by increasing their whiteness. One way to achieve this is by adjusting the Lightness setting in Photoshop.
To begin, locate the “Layers” panel on the right side of the workspace. If you can’t see it, go to the top menu bar and click on “Window,” then select “Layers” to make it visible.
In the Layers panel, select the layer with the teeth. You can do this by clicking on the layer or using the Move Tool to select the teeth directly on the image.
Next, go to the top menu bar and click on “Image,” then select “Adjustments” followed by “Brightness/ Contrast.” A dialog box will appear with sliders for adjusting the brightness and contrast of the image.
Drag the brightness slider to the right, increasing it to 100%. This will make the teeth appear brighter and whiter. You can also adjust the contrast slider if you want to enhance the overall definition of the teeth.
Step 8: Press ctrl+i to Invert the Mask

Now that we have created a mask to isolate the teeth, it’s time to invert it. The purpose of inverting the mask is to switch its properties from hiding the area we want to edit, to revealing it.
Following this step will ensure that any changes we make will only affect the teeth and not the surrounding areas.
Here’s how to do it:
- With the teeth layer selected, click on the layer mask thumbnail in the Layers panel. This will activate the mask.
- Press Ctrl + I (Command + I on a Mac) to invert the mask. You will see that the teeth are now visible and the surrounding areas are hidden.
Step 9: Select the Brush and Paint on Teeth
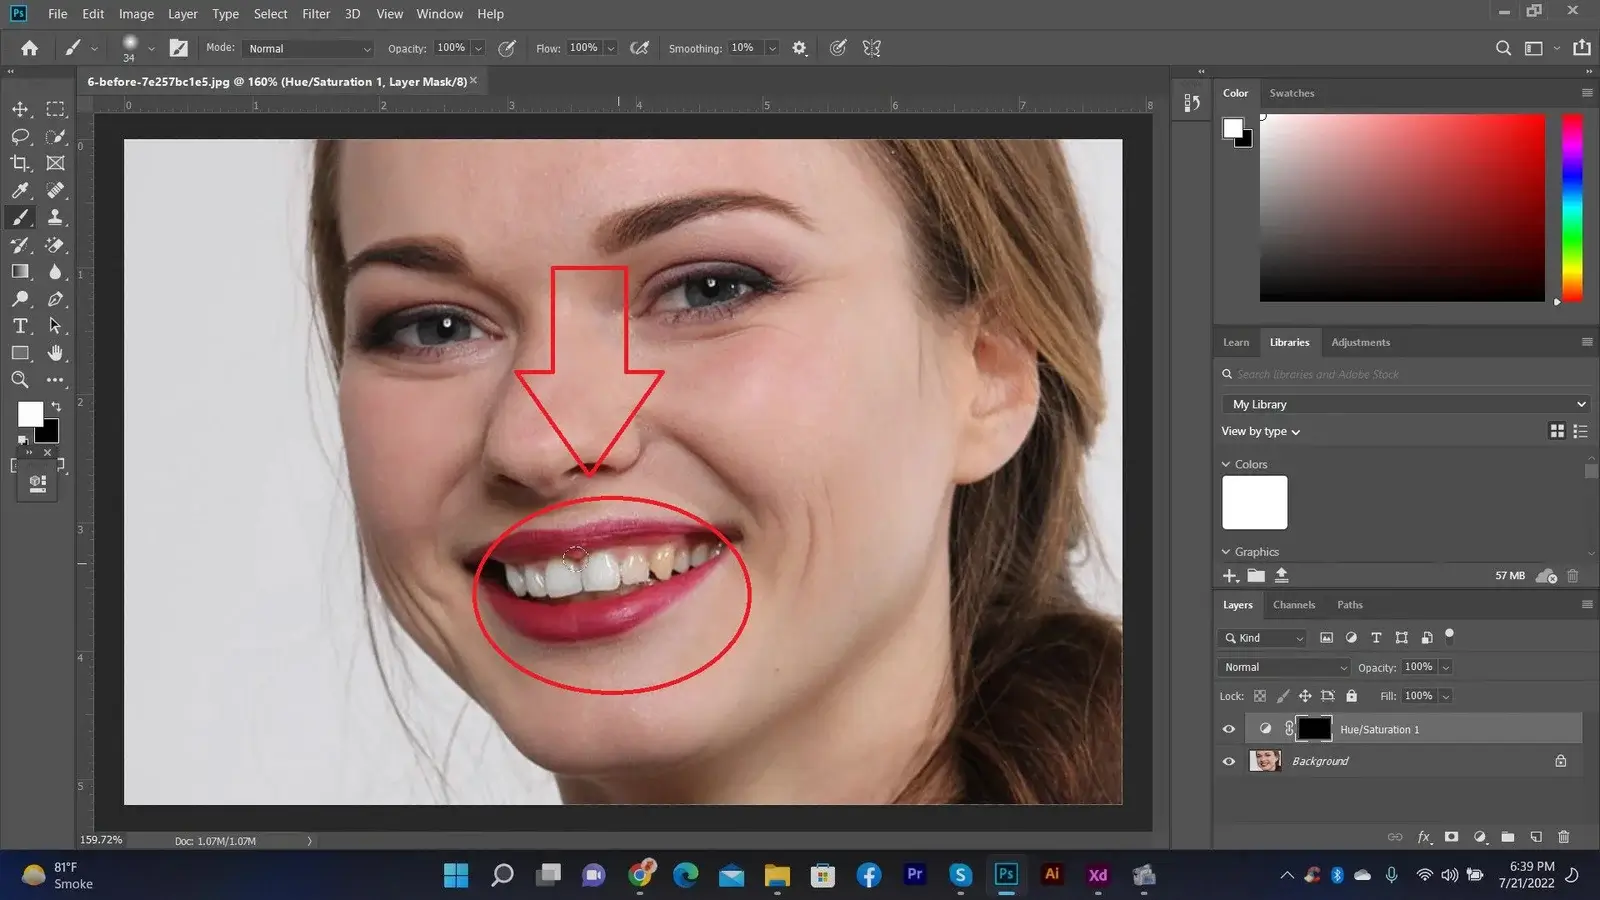
In the process of whitening teeth with Photoshop, Step 9 involves selecting the appropriate brush and painting on the teeth to achieve the desired outcome. This step is crucial as it allows you to selectively apply the whitening effect only to the teeth, giving them a natural and bright appearance.
Step 10: Save and Export
Once you are satisfied with the result, save your edited image by going to “File” and selecting “Save” or “Save As”. Choose an appropriate file format (JPEG, PNG, etc.) for your needs and save it in a desired location on your computer. Remember to always keep a backup of the original image in case you need to revert or make further edits later on.
Can you show us the Photo Editing result?
Now that you have seen some of the simplest and most effective techniques for whitening teeth in your portraits. All you have to do is apply them to your own photos, experiment and practice. Remember to be subtle if you want your smile to be perfect and not seem unreal. You can always reach photo editing Service for you editing / retouching needs.


