Surely more than once, you have seen some of your portrait photographs, and you have thought that the background takes away the prominence of your model. It is true that if we play with the depth of field can blur it, but it is not always that easy. Many times, especially in wide frames, it is impossible to blur the background in Adobe Photoshop as much as we would like. On other occasions, to take specific photos, we may need a very expensive lens that we cannot afford, with a longer focal length or a larger diaphragm opening.
However, Photoshop can quickly and easily blur the background of our photos. As always, you will not need to have advanced knowledge of the program because I am from photo editing services going to explain it to you step by step in text and video.
Why can’t I blur my background?
Manipulating the depth of field to achieve the desired background blur in our photos can pose challenges. It’s not always a matter of lacking the know-how or making errors in camera settings; sometimes, Adobe Photoshop may not provide the background blur we seek due to limitations in our chosen parameters. Changing the sky can serve as a preliminary enhancement before applying blur options. Additionally, attaining the desired effect may require fixed focal lengths with wide apertures or high-quality telephoto lenses with extended focal lengths. Unfortunately, these lenses come with a hefty price tag, making them unaffordable. Exploring alternatives like smart objects can offer creative solutions for refining the photo background despite limitations in equipment.
We may also need fixed focal lengths that allow huge apertures or very bright telephoto lenses with long focal lengths. These lenses are costly, and we may be unable to afford them now.
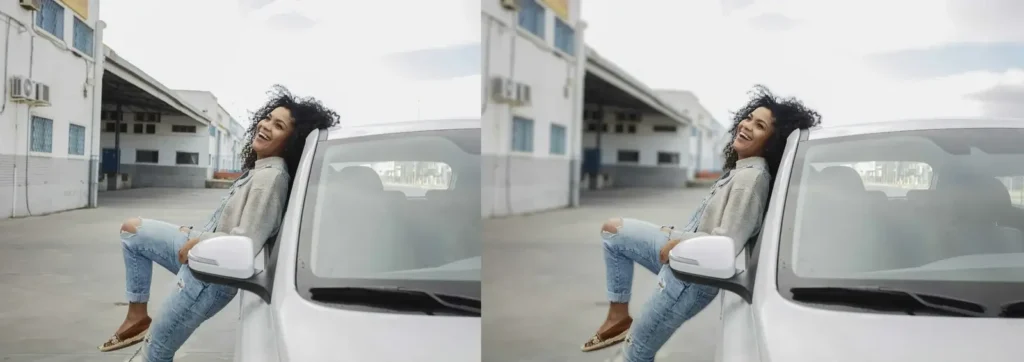
In the following photo, we have a clear example of this problem, which I am sure all of you will have encountered more than once.
Its parameters are the following:
- 35mm focal length: Photograph shot with a fixed focal length lens, which is brighter.
- f/2.5 aperture: The lens could open up to f/1.8, but I didn’t want to risk taking my model out of focus as it’s a wide-open plane. Still, f/1.8 wouldn’t have blurred the background much more, so it would still have been insufficient.
- Shutter speed at 1/500 sec.:To be able to freeze the movement of hair and dress
- ISO 100: I did not need to raise the ISO to expose correctly because the day was very sunny.
To get my model out of focus under these conditions, I could have done it in two different ways, both of which were unworkable:
get closer to her, thus reducing the focal length and making the depth of field smaller. However, I wanted to take an entire shot, to capture the entire trunk and the dog, and to show the dress in its entirety.
Zoom out a lot and use a bright telephoto lens to blur the background like that. However, I do not have such a lens.
Due to these inconveniences, many times, we find ourselves with portrait photographs that we do not quite like because the attention does not fall entirely on our model due to that background that steals the limelight. That is why for these occasions, we can simulate this blurred background effect thanks to editing programs such as Adobe Photoshop. A professional photo editor will explain how to blur a background in Photoshop step by step.

Background Blur in Photoshop Step-by-Step
1. Retouch the Photo as You Like
Usually, the blurring of the background will be the endpoint for our photography, so it is recommended that before starting the process, you make sure that the entire photograph is retouched to your liking. It is not that it cannot be retouched later, but since we will separate the picture into layers, it may be more cumbersome to retouch it later.
So, my advice is to leave the photography to your liking, especially regarding retouching in general. Ultimately, you can give it the final touch in light, color, eye color change, and other adjustments or effects you want to add.
For this example, I’ll use this photo from the same session as the one we’ve seen before. In this photo, we ran into the same problem: by using such a broad frame, we couldn’t blur the background as much as we wanted.
2. Select the Subject
Next, we are going to start with our background blur. First, we must separate our subject from the background so that the blur does not affect him too.
The first thing we will do is duplicate the layer from the Layer/Duplicate Layer menu or with the keyboard shortcut Ctrl+J (or Cmd+J on Mac). This way, we can have this new layer separate the subject of our photograph.
There are plenty of selection tools that you can use to cut out your model from the background. Specifically, I have used the Quick Selection, which is a very useful selection, especially when the person and the background are clearly differentiated. If you are not familiar with selection tools, you can consult one of the following articles:
So, on this new layer we’ve created, select the best way for your subject. If it is more comfortable for you, instead of choosing the subject you can select the entire background, when it comes to separating them, it will not matter.
Then create a mask to cut it out from the menu Layer/Layer Mask/Hide Selection if what you have selected is the background, or Reveal Selection if what you have chosen is the subject. You can also use the quick icon in the layers window to reveal only the selected part and hide everything else, or if you press it while also holding down the Alt key, you will hide only the selected part and show the rest.
3. Fill in the Subject Gap
Now that we have separated our subject from the background, we must blur that background. However, even though we have divided the model into another layer, it is still in our background layer. If we blurred the background layer, we would see that the model is also blurred, creating a strange halo around it that will be excessively noticeable.
How can we avoid this halo around our model? We will have to fill in the background so that our model disappears. To do this, select your model again. Don’t worry, you won’t have to do it again. Just press Ctrl+click (or Cmd+click on Mac) on the layer mask that we have created before, and we will select it again.
-
Fill the Area
Now we will fill that area with an automatic tool provided by Photoshop. However, it does not usually work correctly with selections that are too tight, so to make a looser selection, we will go to the Selection/Modify/Expand menu and give it a few pixels, depending on the size of the photo. I have given it a 20px expansion.
Next, we will go to the Edit / Fill menu or use the keyboard shortcut Shift + F5. Make sure you have the background layer selected. A window will open, and we must choose the drop-down menu-content drop-down menu: According to content. What this will do is fill the selected area taking what is around it as a reference. It usually works well in small areas, but in such a large area, it will probably leave us with a rather ugly background.
However, it will not matter to us because we remember that we will put the layer where our cutout model is on top. The only thing we achieve with this is that by blurring the background in Photoshop, that was created by blurring the model is not created because it will no longer be there.
4. Blur the Background
Now yes, the time has come to blur our background. To simulate a small depth of field, I like the blur we find in the menu Filter / Gallery of Effects Blur / Tilt Shift because it makes a gradual blur. Before applying the filter, make sure you have the background layer selected.
In the window that will open, we can place the circle in the area where our model’s feet will be so that the point appears entirely focused and the background blurs from there, both in front and behind. By touching the slider that appears around that circle, you can make the blur more or less accentuated. You can also move the lines above and below to decide the focus area and make the blur more or less gradual.
In the options on the right, you will also find a slider to create a bokeh that is usually very nice and realistic, especially if there are areas of highlights in the background.
Finally, when your background blur is ready, click the OK option at the top of the window, and you will have your background with a small depth of field. The more accentuated this blur is, the more noticeable the retouching will be, but this is already a matter of taste. Maybe we want to give it a realistic look, or perhaps we prefer to give it a more fantastical touch. It’s all a matter of trying until you find the blur that best suits what you’re looking for.
5. Adjust the Final Photo
As I told you at the beginning, now that we have the photo retouched, we can give it a final touch regarding color correction settings… This is already entirely to your liking, and there are no parameters to follow.
The Camera Raw Filter can come in handy to adjust the photo to your liking. If you are not sure how it works, I recommend that you take a look at our article ” Adobe Camera RAW (ACR): The Complete Guide “.

Blur your backgrounds the easy way with Photoshop!
If you’re looking to add a professional touch to your photos by blurring the background, Photoshop is an excellent tool to achieve stunning results. Blurring the background can make a world of difference, whether you want to emphasize the main subject or create an artistic effect. In this video tutorial, we will guide you through the process so that even beginners can quickly learn how to blur backgrounds in Photoshop.
As you have seen, by following a few simple steps,, you can blur any background to adjust the photograph entirely to your liking. Unfortunately, we can’t always get a perfect base photo, so in these cases, Photoshop will help us to finish by giving it the final touch we need… You can always get help from professional photo editing services for faster results.
Do you dare to try this effect and show us the results? We would love to see you!


