Editing green screen photos is a valuable skill for photographers and designers, allowing for seamless background removal and creative compositing. Here’s a comprehensive guide to help you master green screen photo editing.
How to Edit Green Screen Photos: Step-by-Step Guide
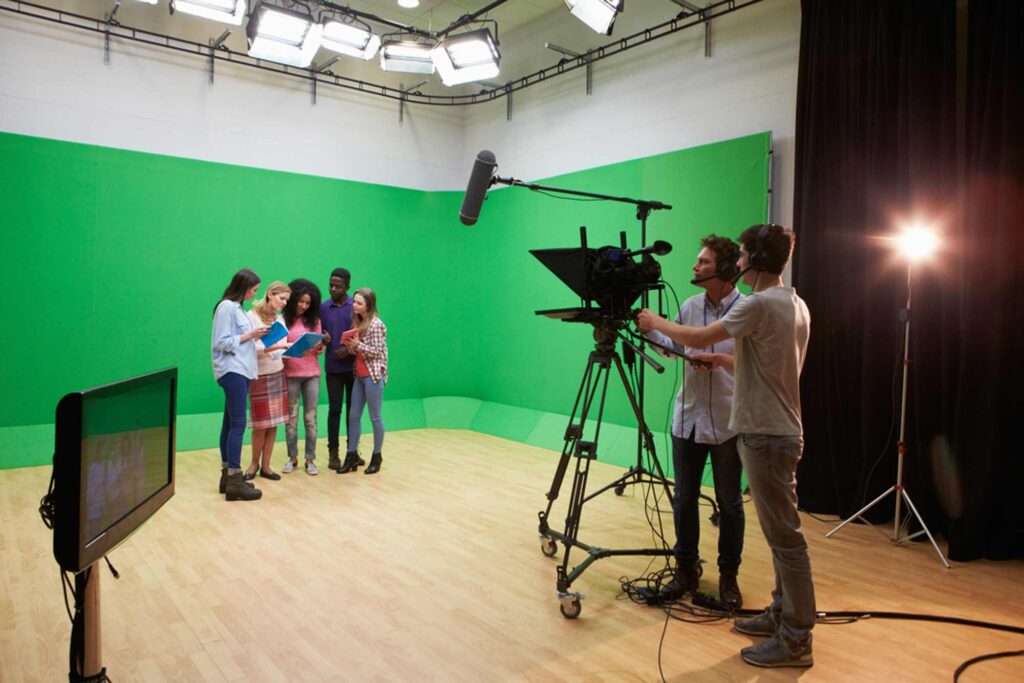
1. Preparing Your Green Screen Photo
Setting Up the Shoot:
- Lighting: Ensure the green screen is evenly lit to avoid shadows and color variations. Use soft, diffused lighting for the best results.
- Distance: Position your subject a few feet away from the green screen to prevent shadows and green spill on your subject.
- Clothing and Props: Avoid using green clothing or props that might blend with the background.
Shooting in RAW:
- RAW Format: Shoot in RAW format to retain the maximum amount of detail and flexibility for post-processing.
2. Importing and Organizing Your Photos
Choosing Software:
- Adobe Photoshop: A powerful tool for detailed editing and compositing.
- Adobe After Effects: Ideal for video green screen editing.
- Final Cut Pro: Another excellent option for video editing.
- GIMP: A free alternative for photo editing.
Importing Photos:
- Organize Files: Import your photos into your chosen software and organize them for easy access.
3. Removing the Green Screen Background
Using Adobe Photoshop:
- Select and Mask: Open your photo in Photoshop. Go to Select > Select and Mask. Use the Quick Selection Tool to outline your subject.
- Refine Edge Brush: Use the Refine Edge Brush Tool to fine-tune the selection, especially around hair or intricate details.
- Decontaminate Colors: Check the Decontaminate Colors box to remove any green spill on your subject.
- Output to New Layer: Output the selection to a new layer with a mask.
Using Adobe After Effects:
- Keylight Effect: Import your footage and apply the Keylight effect from the Effects & Presets panel.
- Screen Color: Use the eyedropper tool to select the green background. Adjust Screen Gain and Screen Balance for better results.
- Edge Cleanup: Use the Screen Matte and Edge Color Correction settings to refine the edges and remove green spill.
Alternative Software (e.g., GIMP):
- Color to Alpha: Open your image in GIMP. Go to Colors > Color to Alpha and select the green color. This will make the green background transparent.
- Refine Selection: Use the Eraser Tool or the Free Select Tool to clean up any remaining green areas.
4. Adding a New Background
Choosing a Background:
- Image Quality: Select a high-quality background image that matches the lighting and perspective of your original photo.
- Blending: Ensure the background complements your subject to create a realistic composition.
Placing the Background:
- Layer Order: In Photoshop, place the new background layer below the subject layer.
- Transform Tool: Use the Transform Tool (Ctrl+T or Command+T) to resize and position the background appropriately.
5. Blending the Subject with the Background
Color Matching:
- Adjustment Layers: Use Adjustment Layers to match the colors and tones of the subject with the new background. Adjust Levels, Curves, and Color Balance as needed.
- Blend Modes: Experiment with different blend modes for more natural integration.
Shadow and Light:
- Create Shadows: Add realistic shadows to ground the subject in the new environment. Use a soft brush with a low opacity to paint shadows on a new layer.
- Lighting Effects: Adjust the lighting on the subject to match the light source of the background. Use Dodge and Burn tools for subtle adjustments.
Edge Refinement:
- Feathering: Feather the edges of the subject layer mask slightly to soften the transition between the subject and background.
- Defringe: Use the Defringe option in Photoshop (Layer > Matting > Defringe) to remove any leftover green edges.
6. Final Touches
Detail Enhancements:
- Sharpening: Apply a sharpening filter to enhance details.
- Noise Reduction: Use noise reduction to smooth any grainy areas, especially if the background is cleaner than the original photo.
Color Grading:
- Overall Tone: Apply a color grade to unify the colors of the subject and background. Use tools like Gradient Maps or Lookup Tables (LUTs) for creative effects.
- Vibrance and Saturation: Adjust vibrance and saturation to ensure the colors are vibrant but not overly saturated.
7. Exporting the Final Image
File Format:
- JPEG or PNG: Export your final image as a high-quality JPEG or PNG. PNG is preferable if you need to maintain transparency.
- Resolution: Ensure the resolution is appropriate for the intended use, whether it’s for web display or print.
Export Settings:
- Photoshop: Use File > Export > Export As to choose your preferred settings.
- Other Software: Follow similar steps in your chosen software to export the final image.
Commonly Requested Retouching Services for Green Screen Photos
1. Background Replacement
Replacing backgrounds is a common request. Clients often need different backgrounds for various uses, from professional headshots to creative compositions. Ensuring the new background matches the lighting and perspective of the subject is crucial for a seamless blend.
2. Color Correction and Matching
Matching the color tones of the subject to the new background is essential for a cohesive look. This involves adjusting the white balance, color balance, and using selective color correction to ensure harmony between the subject and background.
3. Shadow and Light Integration
Creating realistic shadows and lighting effects helps ground the subject in the new environment. This involves adding soft shadows beneath the subject and adjusting the light direction and intensity to match the background’s light source.
4. Edge Refinement
Clean edges are crucial for a professional finish. Techniques like feathering, defringing, and using the Refine Edge tool ensure the subject blends smoothly with the background, avoiding any harsh lines or leftover green edges.
5. Removal of Green Spill
Green spill, where green light reflects onto the subject, is a common issue. Decontaminating colors and using adjustment layers to remove green hues from the subject ensures a natural appearance.
By following this comprehensive guide, you can effectively edit green screen photos, creating seamless and professional composites. Whether you’re a beginner or an experienced editor, these steps and techniques will help you achieve high-quality results.
When and Why to Use a Green Screen
Using a green screen can significantly enhance your photography, providing flexibility and creativity in post-processing. Here’s an in-depth guide for photographers on when and why to use a green screen, and the types of photos that benefit most from this technique.
Why Use a Green Screen?
1. Versatility in Post-Production
- Background Replacement: A green screen allows you to replace the background with any scene, offering endless creative possibilities. Whether it’s for professional portraits, product photography, or creative projects, you can transport your subject to any location or setting.
- Consistent Lighting Control: By shooting against a green screen, you can control the lighting conditions and eliminate unwanted background elements, ensuring a clean and distraction-free image that’s easy to edit.
- Cost-Effective Solutions: Instead of traveling to various locations for a shoot, a green screen enables you to create different settings within the confines of your studio, saving time and resources.
2. Enhancing Creative Projects
- Special Effects: For photographers involved in creative projects like fantasy, sci-fi, or conceptual photography, a green screen is invaluable for integrating special effects and fantastical backgrounds seamlessly.
- Advertising and Marketing: In commercial photography, green screens are used to create versatile marketing materials. Products can be placed against various backgrounds to appeal to different target audiences without the need for multiple shoots.
Who Should Use a Green Screen?
1. Portrait Photographers
- Professional Headshots: For corporate headshots or actor portfolios, green screens offer a neutral background that can be easily swapped for professional-looking office settings or custom backdrops.
- Creative Portraits: Artists and creatives can use green screens to place their subjects in imaginative and thematic settings, enhancing the visual storytelling of their portraits.
2. Product Photographers
- E-commerce: Online retailers benefit from green screen photography by showcasing products against various backgrounds, including plain white for a clean look or more elaborate scenes that highlight product use.
- Advertising: For advertisements, product photographers can create composite images that place products in context, such as lifestyle settings or branded environments.
3. Event Photographers
- Weddings and Parties: Green screens are popular in photo booths at events, allowing guests to choose different backgrounds for fun and memorable photos.
- Corporate Events: At trade shows and corporate events, green screens can be used to create branded backgrounds for attendee photos, enhancing the promotional impact.
4. Film and Video Producers
- Commercials and Music Videos: Green screens are extensively used in film production for scenes that require special effects or virtual sets, providing flexibility and creative freedom.
- Vlogs and Online Content: Content creators on platforms like YouTube use green screens to create professional-looking videos with dynamic backgrounds, from news-style setups to animated scenes.
Types of Photos that Benefit from a Green Screen
1. Professional Headshots and Portraits
- Custom Backgrounds: Replace the green screen with tailored backgrounds that match the client’s professional or creative needs.
- Consistency: Maintain consistent lighting and background across a series of portraits, ensuring a cohesive look for portfolios or corporate use.
2. Product Photography
- Multiple Backgrounds: Showcase products in various settings without multiple shoots, ideal for catalogues and online stores.
- Detail Emphasis: Highlight product details by removing distracting elements and focusing on the subject.
3. Event Photography
- Interactive Photo Booths: Create interactive experiences with customizable backgrounds for event guests.
- Brand Integration: Use branded backgrounds for corporate events to reinforce branding and marketing efforts.
4. Creative and Conceptual Photography
- Fantasy and Sci-Fi Themes: Place subjects in imaginative worlds and scenarios that are impossible or impractical to create physically.
- Artistic Expression: Experiment with different backgrounds and effects to enhance the artistic vision of the photograph.
5. Film and Television Production
- Special Effects Integration: Seamlessly integrate special effects and CGI elements with live-action footage.
- Set Flexibility: Create various virtual sets without the need for physical construction, saving time and resources.
Tips for Using Green Screen Effectively
- Proper Lighting: Ensure the green screen is evenly lit to avoid shadows and hotspots, which can complicate the keying process.
- 2. Distance: Position your subject a few feet away from the green screen to prevent green spill and shadows.
- 3. Avoid Green Clothing: Ensure subjects are not wearing green to avoid blending into the background.
- 4. High-Quality Screen: Use a high-quality green screen material to ensure a smooth and consistent background.
- 5. Camera Settings: Use the correct camera settings to capture sharp and well-exposed images, facilitating easier background removal.


