In the visually-driven realm of Instagram, photo editing stands as a crucial skill for creating captivating and impactful content. Whether you’re a seasoned influencer, a business owner, or an amateur photographer, refining your photos can significantly elevate your Instagram presence. This comprehensive guide delves deep into the nuances of editing Instagram photos, covering everything from Instagram filters and top editing software to detailed guides on how to use these tools for both mobile and desktop platforms. We’ll also explore popular Instagram photo styles and provide step-by-step instructions on achieving stunning edits.
1. Instagram Filters: A Palette of Possibilities
These Instagram filters are an excellent starting point for anyone looking to enhance their photos with minimal effort. Instagram provides a diverse array of filters, each with its unique characteristics. These filters are designed to instantly transform the look and feel of your photos. Let’s take a closer look at some of the prominent Instagram filters and how to use them:
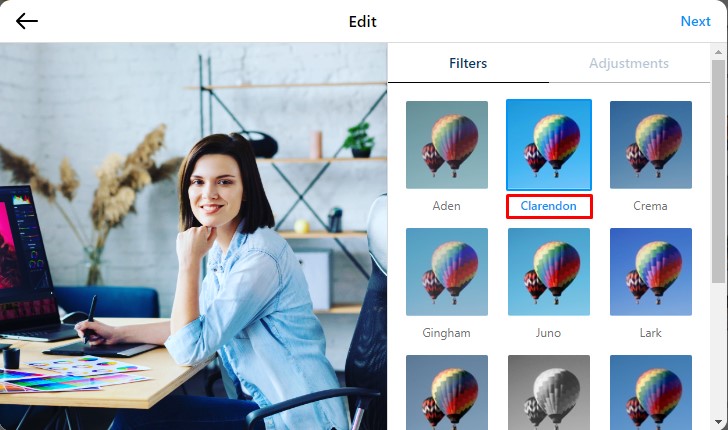
a. Clarendon:
The Clarendon filter is a go-to choice for many Instagram users, known for boosting colors and adding vibrancy to images. It’s particularly effective for landscapes and outdoor shots. To use Clarendon:
-
Select Your Photo:
- Choose the photo you want to edit and tap on the editing icon (a square with sliders) on Instagram.
-
Navigate to Filters:
- Swipe left to access the available filters, and find Clarendon.
-
Adjust Intensity:
- Tap on the filter to apply it and adjust the intensity using the slider. Experiment to find the right balance.
-
Fine-Tune if Needed:
- Use additional editing tools (brightness, contrast, etc.) to fine-tune the image further.
When to Use Clarendon:
- Best for outdoor and landscape shots.
- Ideal for adding vibrancy and enhancing colors.
Pro Tip: Clarendon works well with images that have a mix of cool and warm tones.
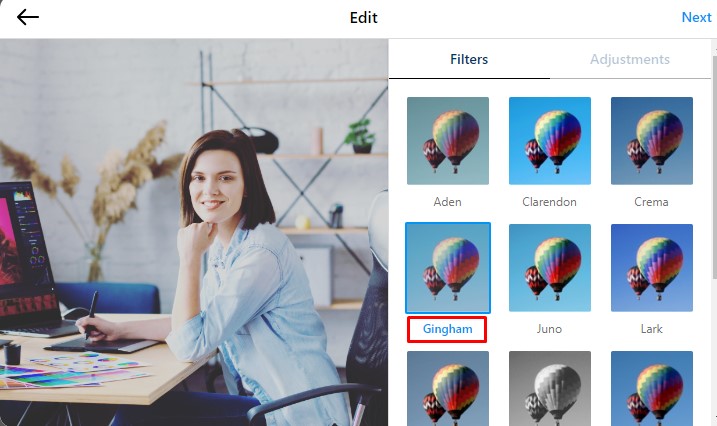
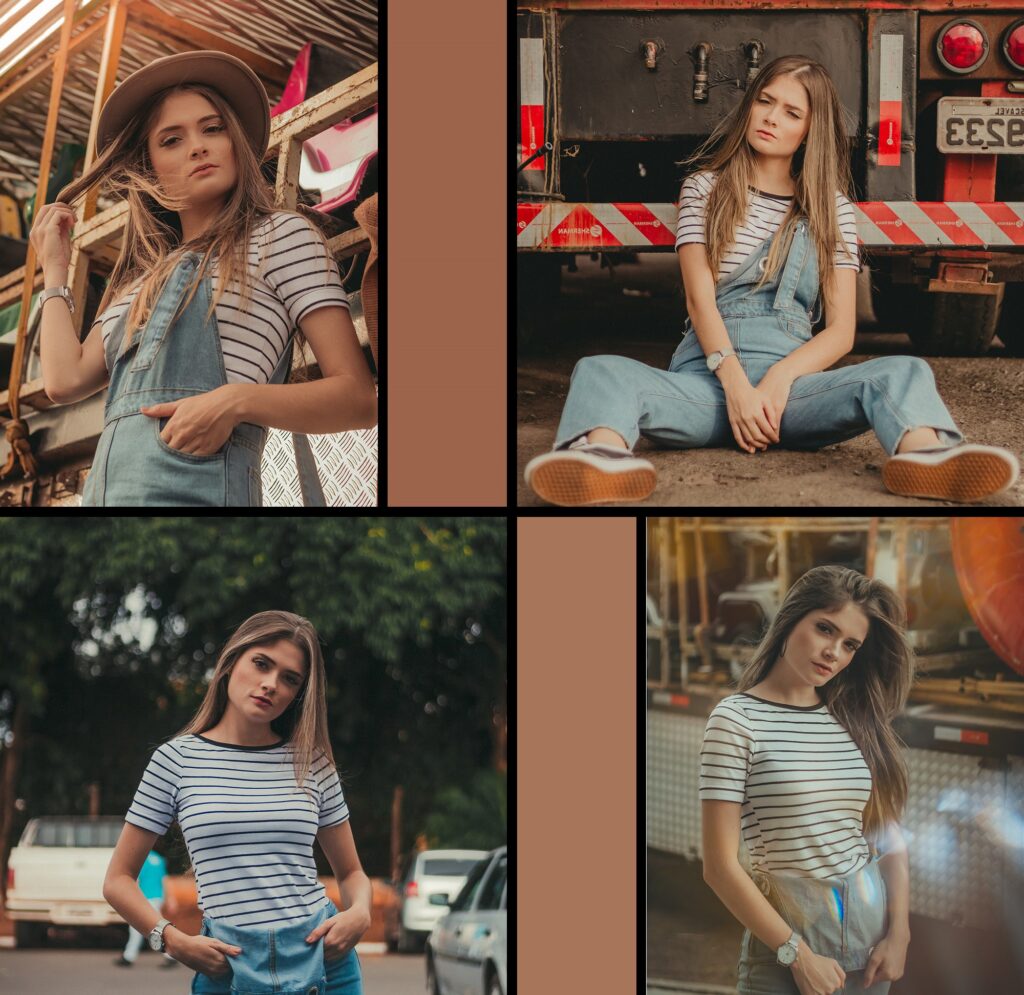
b. Gingham:
Gingham is a filter that imparts a subtle vintage feel to your photos, making it a popular choice for those seeking a classic aesthetic. It works well with various subjects, but it’s particularly effective for fashion and lifestyle photography. Here’s a step-by-step guide on using the Gingham filter:
-
Select Your Photo:
- Open the Instagram app and choose the photo you want to edit.
-
Access Filters:
- Tap on the editing icon and swipe left to find the Gingham filter.
-
Apply the Filter:
- Tap on Gingham to apply it to your photo.
-
Adjust Intensity:
- Use the slider to control the intensity of the filter.
-
Fine-Tune Your Image:
- Consider using additional tools to adjust brightness, contrast, and saturation as needed.
When to Use Gingham:
- Ideal for creating a vintage or retro vibe.
- Well-suited for fashion and lifestyle shots.
Pro Tip: Gingham works exceptionally well with photos that have a straightforward composition and strong lines.
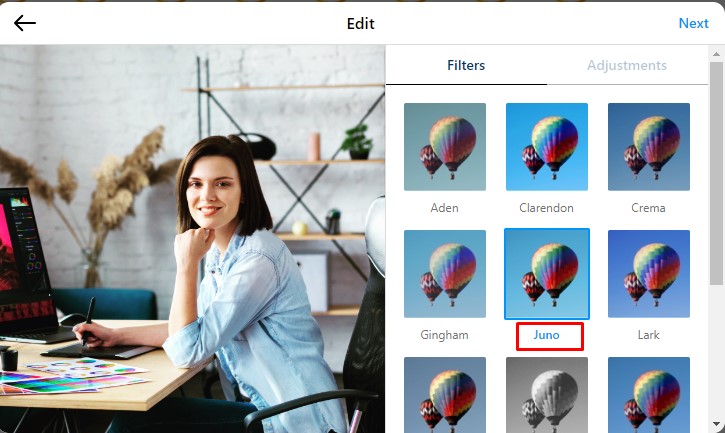
c. Juno:
Juno is a versatile filter that intensifies warm tones, creating a radiant and warm ambiance in your photos. This filter is well-suited for a variety of images, but it particularly shines in portraits and food photography. Here’s a comprehensive guide on using the Juno filter:
-
Select Your Photo:
- Open Instagram and choose the photo you want to edit.
-
Navigate to Filters:
- Tap the editing icon and swipe left to find Juno in the filter options.
-
Apply the Filter:
- Tap on Juno to apply it to your photo.
-
Adjust Intensity:
- Utilize the slider to control the intensity of the filter according to your preference.
-
Fine-Tune Your Image:
- Use additional editing tools for more precise adjustments, such as brightness, shadows, and highlights.
When to Use Juno:
- Perfect for enhancing warm tones and creating a cozy, inviting atmosphere.
- Particularly effective for portraits and food photography.
Pro Tip: Experiment with combining Juno with other editing tools to achieve a customized look.

d. Lark:
Lark is a filter designed to brighten and enhance the overall exposure of your photos. It’s versatile and suitable for various images, making it a popular choice for a clean and modern look. Here’s a step-by-step guide on using the Lark filter:
-
Select Your Photo:
- Open Instagram and choose the photo you wish to edit.
-
Access Filters:
- Tap the editing icon and swipe left until you find the Lark filter.
-
Apply the Filter:
- Tap on Lark to apply it to your photo.
-
Adjust Intensity:
- Use the intensity slider to control how much of the Lark filter you want to apply.
-
Fine-Tune Your Image:
- Utilize additional editing tools for refining elements such as contrast, saturation, and sharpness.
When to Use Lark:
- Ideal for brightening and enhancing exposure.
- Works well across various image types, providing a fresh and modern aesthetic.
Pro Tip: Lark is particularly effective for images with a lot of natural light.
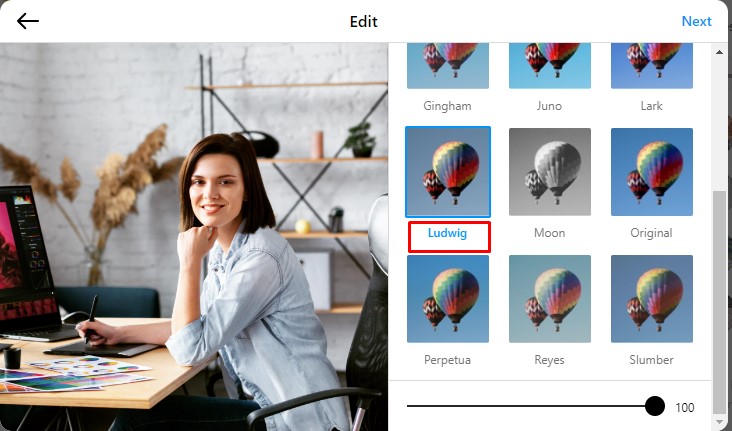
e. Ludwig:
Ludwig is a filter known for providing a soft and refined look with a particular focus on highlights. This filter imparts a sophisticated touch to your images, making it suitable for fashion and product photography. Here’s a detailed guide on using the Ludwig filter:
-
Select Your Photo:
- Open Instagram and choose the photo you want to edit.
-
Navigate to Filters:
- Tap the editing icon and swipe left to find Ludwig in the filter options.
-
Apply the Filter:
- Tap on Ludwig to apply it to your photo.
-
Adjust Intensity:
- Use the intensity slider to control the strength of the Ludwig filter.
-
Fine-Tune Your Image:
- Employ additional editing tools to refine details like highlights, shadows, and overall tonality.
When to Use Ludwig:
- Suitable for images where a soft and refined look is desired.
- Particularly effective for fashion and product shots.
Pro Tip: Ludwig works well with images featuring strong highlights and a need for a polished appearance.
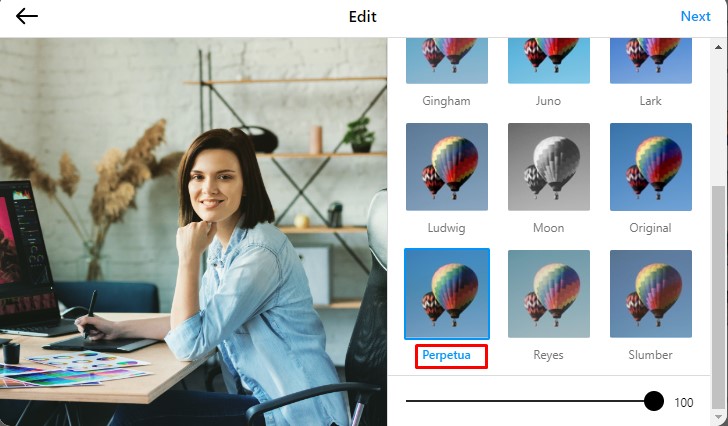
f. Perpetua:
Perpetua is a filter designed to enhance blues and greens, creating a fresh and cool tone in your photos. This filter is ideal for nature and travel images, giving them a vibrant and inviting quality. Let’s delve into a step-by-step guide on using the Perpetua filter:
-
Select Your Photo:
- Open Instagram and choose the photo you intend to edit.
-
Access Filters:
- Tap the editing icon and swipe left until you find the Perpetua filter.
-
Apply the Filter:
- Tap on Perpetua to apply it to your photo.
-
Adjust Intensity:
- Use the intensity slider to control the strength of the Perpetua filter.
-
Fine-Tune Your Image:
- Utilize additional editing tools to refine elements like brightness, contrast, and saturation.
When to Use Perpetua:
- Perfect for images with prominent blues and greens.
- Particularly effective for nature and travel photography.
Pro Tip: Experiment with Perpetua to enhance the color palette of your photos, especially in outdoor and scenic shots.
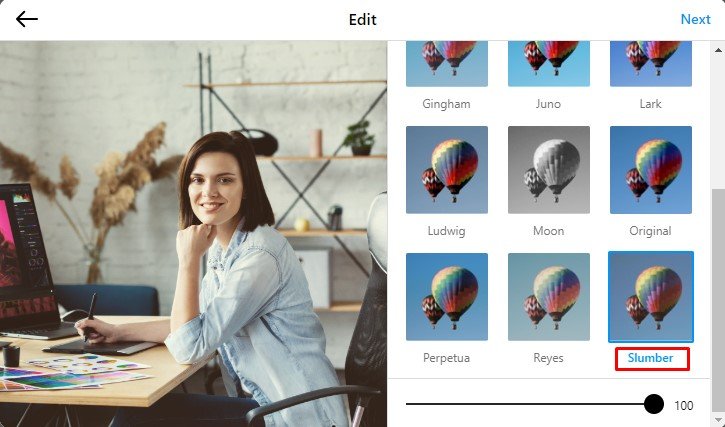
g. Slumber:
Slumber is a filter that adds a dreamy and muted effect to your photos, providing a softer aesthetic. This filter is versatile and can work well with a range of images. Let’s explore a detailed guide on using the Slumber filter:
-
Select Your Photo:
- Open Instagram and choose the photo you wish to edit.
-
Navigate to Filters:
- Tap the editing icon and swipe left until you find the Slumber filter.
-
Apply the Filter:
- Tap on Slumber to apply it to your photo.
-
Adjust Intensity:
- Use the intensity slider to control how much of the Slumber filter you want to apply.
-
Fine-Tune Your Image:
- Leverage additional editing tools to refine aspects like exposure, shadows, and highlights.
When to Use Slumber:
- Ideal for creating a dreamy and muted effect.
- Works well across various image types, adding a soft and gentle touch.
Pro Tip: Slumber can enhance the mood of your photos, making it an excellent choice for portraits and lifestyle shots.
h. Valencia:
Valencia is a filter that intensifies warm tones while adding a subtle vintage touch to your photos. It imparts a warm and cozy vibe, making it suitable for various images. Let’s delve into a comprehensive guide on using the Valencia filter:
-
Select Your Photo:
- Open Instagram and choose the photo you want to edit.
-
Access Filters:
- Tap the editing icon and swipe left until you find the Valencia filter.
-
Apply the Filter:
- Tap on Valencia to apply it to your photo.
-
Adjust Intensity:
- Utilize the intensity slider to control the strength of the Valencia filter.
-
Fine-Tune Your Image:
- Use additional editing tools to refine elements like saturation, contrast, and overall tone.
When to Use Valencia:
- Ideal for intensifying warm tones and creating a vintage atmosphere.
- Well-suited for creating a cohesive and warm Instagram feed.
Pro Tip: Valencia works exceptionally well with images featuring natural light and earthy tones.
i. Willow:
Willow is a filter that desaturates colors and adds a monochromatic vibe to your photos. It imparts a subtle and muted look, making it suitable for various creative expressions. Here’s a detailed guide on using the Willow filter:
-
Select Your Photo:
- Open Instagram and choose the photo you intend to edit.
-
Navigate to Filters:
- Tap the editing icon and swipe left until you find the Willow filter.
-
Apply the Filter:
- Tap on Willow to apply it to your photo.
-
Adjust Intensity:
- Use the intensity slider to control how much of the Willow filter you want to apply.
-
Fine-Tune Your Image:
- Utilize additional editing tools to refine elements like shadows, highlights, and sharpness.
When to Use Willow:
- Ideal for creating a subdued and monochromatic aesthetic.
- Works well for achieving a minimalist and muted look.
Pro Tip: Willow can enhance the mood of your photos, particularly for images with strong compositions.
2. Top Editing Software: Unleashing Creative Power
Now that we’ve explored the intricacies of Instagram filters, let’s shift our focus to advanced photo editing software. In this section, we’ll delve into Adobe Lightroom, a powerful tool that offers extensive capabilities for both desktop and mobile editing.
a. Adobe Lightroom: Unveiling Creative Potential
Adobe Lightroom stands as a powerhouse in photo editing, offering a myriad of tools for both basic and advanced adjustments. It is renowned for its seamless integration with the Adobe Creative Cloud.
Desktop Editing Guide:
Import Your Photo:
Open Lightroom, click on “File” and select “Import Photos and Videos.”
- Choose the photo you want to edit and click “Import.”
Basic Adjustments:
- Go to the Develop module and adjust exposure, contrast, and highlights using the sliders.
Color Correction:
- Navigate to the HSL/Color panel and fine-tune colors by adjusting hue, saturation, and luminance.
Detail Enhancements:
- Access the Detail panel to sharpen the image and reduce noise as needed.
Apply Presets:
- Explore and apply presets from the left panel, adjusting the intensity to your liking.
Export and Share:
- Click on “File” and select “Export.” Choose export settings and share your edited photo directly from Lightroom or upload it to Instagram.
Pro Tip: Create and apply your presets for a consistent and personalized Instagram feed.
a. Adobe Lightroom: Unveiling Creative Potential (Mobile Editing Guide)
Adobe Lightroom’s mobile app brings professional-grade photo editing tools to the palm of your hand. Here’s a step-by-step guide on how to leverage Adobe Lightroom for mobile editing:
1. Import Your Photo:
- Open the Lightroom app on your mobile device.
- Tap the ‘+’ icon and select the photo you want to edit.
2. Basic Adjustments:
- Use the intuitive sliders for exposure, contrast, and other basic adjustments. Swipe left and right to access different editing panels.
3. Color Correction:
- Access the Color panel to fine-tune hues, saturation, and luminance. For more precise adjustments, use the Mix option to edit specific color ranges.
4. Detail Enhancements:
- Tap on the Detail icon to sharpen the image and reduce noise. Adjust sliders for sharpening and noise reduction according to your preferences.
5. Apply Presets:
- Explore and apply presets from the Presets panel. Adjust the intensity of the preset to achieve the desired look.
6. Export and Share:
- Tap on the Share icon. Choose the export settings, and share your edited photo directly to Instagram or save it to your device.
Pro Tip: Use Lightroom’s Sync feature to seamlessly edit across both desktop and mobile devices.
b. VSCO: Navigating the Aesthetics of Mobile Editing
VSCO, known for its minimalist interface and film-like filters, has gained popularity for its user-friendly experience and social community.
Mobile Editing Guide:
Import Your Photo:
- Open the VSCO app, tap on the ‘+’ icon, and select your image.
Basic Adjustments:
- Use the sliders to make basic adjustments like exposure, contrast, and saturation.
Color Correction:
- Utilize the available filters and adjust their intensity to achieve the desired look.
Presets and Export:
- Explore VSCO’s extensive library of filters, apply one, and save or share your edited photo.
Pro Tip: Join the VSCO community to discover and share unique editing styles and techniques.
c. Snapseed: A Comprehensive Mobile Editing Experience
Snapseed, a Google-owned app, offers a wide range of editing tools, making it a favorite among mobile photographers.
Mobile Editing Guide:
Import Your Photo:
- Open Snapseed, tap on the ‘+’ icon, and select the image you want to edit.
Basic Adjustments:
- Use the Tune Image tool for basic adjustments like brightness, contrast, and saturation.
Selective Editing:
- Tap on the pencil icon and select the “Selective” tool to make precise adjustments to specific areas.
Filters and Styles:
- Explore Snapseed’s filters and styles, adjusting their intensity for a customized look.
Export:
- Save or share your edited photo directly from the app.
Pro Tip: Experiment with the Lens Blur tool to add a professional-looking depth of field to your photos.
d. Afterlight: Enhancing Creativity on the Go
Afterlight combines simplicity with a rich set of features, offering users a range of filters, textures, and frames.
Mobile Editing Guide:
Import Your Photo:
- Open Afterlight, tap on the ‘+’ icon, and select the image you want to edit.
Basic Adjustments:
- Use the intuitive sliders for basic adjustments such as brightness, contrast, and saturation.
Textures and Overlays:
- Experiment with textures and overlays to add creative elements to your photo.
Filters and Styles:
- Apply Afterlight’s filters and adjust their intensity to achieve the desired effect.
Export:
- Save or share your edited image directly from the app.
Pro Tip: Use Afterlight’s blending modes to create unique and artistic combinations of textures and overlays.
Popular Instagram Photo Styles: Crafting Your Aesthetic
Understanding the popular Instagram photo styles can guide your editing process and help you tailor your content to match the expectations of your audience. Here are some prevalent styles and tips on how to edit for each:
a. Lifestyle and Travel:
Editing Approach:
- Brighten and enhance colors to showcase vibrant landscapes.
- Utilize Adobe Lightroom’s graduated filters for balanced exposure in the sky and foreground.
Editing Tools:
- Adobe Lightroom for precise color adjustments.
- VSCO for its film-like filters.
b. Fashion and Style:
Editing Approach:
- Maintain a clean and polished look with emphasis on color coordination.
- Use Adobe Lightroom’s HSL panel to fine-tune specific colors.
Editing Tools:
- Adobe Lightroom for detailed adjustments.
- VSCO for its minimalist and fashion-forward filters.
Fashion and style on Instagram often demand a sophisticated and cohesive aesthetic. Emphasize color harmony, contrast, and sharpness to bring out the details in clothing and accessories.
c. Food and Culinary:
Editing Approach:
- Ensure crisp, well-lit images with enhanced colors.
- Utilize Snapseed’s selective editing to highlight key elements.
Editing Tools:
- Snapseed for selective adjustments.
- Afterlight for creative overlays and textures.
When showcasing culinary delights on Instagram, focus on vibrant colors and appealing compositions. Highlight key elements using selective editing tools for a mouthwatering effect.
4. Step-by-Step Editing Guide: Crafting the Perfect Edit
Now, let’s dive into a detailed step-by-step guide using Adobe Lightroom, one of the most versatile tools for Instagram photo editing.
a. Desktop Editing Guide:
1. Import Your Photo:
- Open Adobe Lightroom on your desktop.
- Click on “File” and select “Import Photos and Videos.”
- Choose the photo you want to edit and click “Import.”
2. Basic Adjustments:
- Go to the Develop module.
- Adjust exposure, contrast, and highlights using the sliders.
3. Color Correction:
- Navigate to the HSL/Color panel.
- Fine-tune colors by adjusting hue, saturation, and luminance.
4. Detail Enhancements:
- Access the Detail panel.
- Sharpen the image and reduce noise as needed.
5. Apply Presets:
- Explore and apply presets from the left panel.
- Adjust the intensity of the preset to your liking.
6. Export and Share:
- Click on “File” and select “Export.”
- Choose export settings and share your edited photo directly from Lightroom or upload it to Instagram.
Pro Tip: Create and apply your presets for a consistent and personalized Instagram feed.
b. Mobile Editing Guide:
1. Import Your Photo:
- Open the Lightroom app on your mobile device.
- Tap the ‘+’ icon and select the photo you want to edit.
2. Basic Adjustments:
- Use the intuitive sliders for exposure, contrast, and other basic adjustments.
3. Color Correction:
- Access the Color panel.
- Fine-tune colors using the available sliders.
4. Detail Enhancements:
- Tap on the Detail icon.
- Adjust sharpness and reduce noise as needed.
5. Apply Presets:
- Explore and apply presets from the Presets panel.
- Adjust the intensity of the preset to your liking.
6. Export and Share:
- Tap on the Share icon.
- Choose the export settings and share your edited photo directly to Instagram.
Pro Tip: Use Lightroom’s Sync feature to seamlessly edit across both desktop and mobile devices.
Editing on the go has never been more convenient with Adobe Lightroom’s mobile version, offering professional-grade tools at your fingertips.
Conclusion
Mastering the art of Instagram photo editing requires a blend of creativity, technical know-how, and an understanding of your unique style. Whether you opt for Instagram’s native filters or explore the capabilities of advanced editing software like Adobe Lightroom, the key is to experiment, learn, and refine your approach over time. With this comprehensive guide, you have the tools and knowledge to craft visually stunning images that not only resonate with your audience but also elevate your Instagram presence to new heights. Embrace the journey of creating captivating content, and let your creativity shine through every post.


