
Achieving a well-executed portrait can be incredibly satisfying, offering profound insights into the subject. However, removing stray hairs in photographs can be challenging. These are the individual strands protruding from the subject’s head, and their removal is crucial, especially in business or fashion shots. While Adobe Photoshop is used to showcase these methods, they apply to virtually any image editor, including Affinity Photo, Lightroom, Camera Raw, and others. Learn the art of removing stray hairs and refining your portraits with these techniques, whether you’re using Photoshop for hair retouching or other photo editing services.
For dealing with flyaways while preserving a natural-looking outcome, there are three major methods. It involves striking a balance between taste and need, just like with any touch-up. If you take it too far, you’ll develop “hoof hair,” which frequently appears false.
In the video below, a seasoned photo editor demonstrates effective techniques for tidying up loose hair in portraits. Whether you choose to watch the professional editor guide you through the process or prefer reading the text instructions, you’ll gain valuable insights.
Video Guide on Removing Stray Hairs in Photoshop
It can greatly help to save time and effort later on if your subject is well-groomed or if you hire a stylist. Use these three methods for the remainder.
Technique 1: Clone Stamp Tool
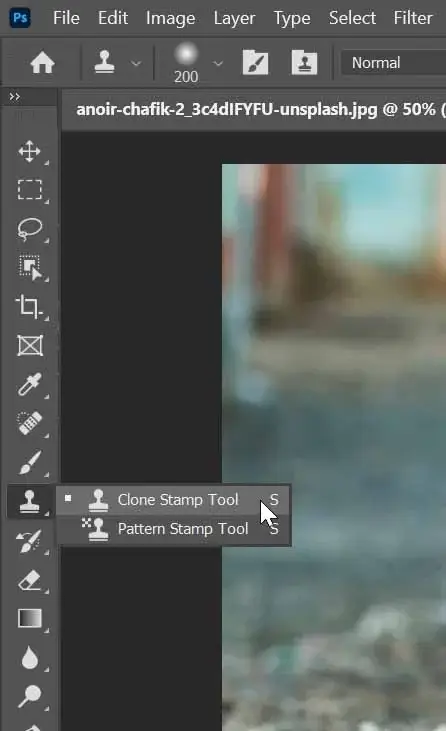
In Adobe Photoshop, Clone Stamp is the apparent tool for hair removal. Show the spotless area first, then brush your hair to make it fit in with the surroundings. You will discover that this tool has flaws if you have used it before.
His greatest asset is also his worst flaw; it replicates exactly what it samples, which presents a challenge when dealing with textured backdrops or fluctuations in color or brightness. Clone Stamp is the ideal technique, nevertheless, for backdrops that are consistently lighted and colored.
By employing several Blend Modes for the brush, you can improve your clone and lessen undesirable variances. I operate in three different ways:
- Normal
- darken
- light up
The Normal option generally works but can be troublesome with backgrounds that have light textures since it can be excessively demanding. My adjustments can be made very precisely by using the other two modes.
In order to correct lighter hair on a darker background, I utilize the Darken blend mode. To correct darker hair on a lighter background, I use the Lighten blend mode.
Once the hair is the same luminance and color as the sampled area, the effect is no longer there. It won’t touch the parts that already match, so even if your brush size is enormous, your repairs will only be a few pixels wide.
Technique 2: Healing Brush Tool
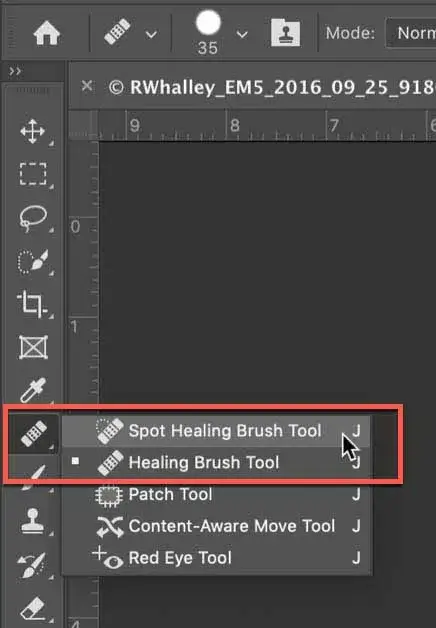
The Clone Stamp tool has been upgraded into the Healing Brush. copies the sampled region’s color, brightness, and texture to the destination area. Then use maths to effortlessly combine the two elements into something that appears natural.
For cleaning blemishes, blackheads, unsightly facial or body hair, sensor dust, etc., the concealer brush is the best option. It performs better than the clone technique partly because it seamlessly integrates the sample areas with the target environment rather than making an identical copy.
For backgrounds that are a little more intricate or textured, use this tool. It can also be used to eliminate pests. The texture has been preserved by the clone buffer.
I use it to remove hair from clothing or that crosses my face so that I may keep the delicate details of the fabric or skin. Once more, you can fine-tune your retouch using the Blending Modes.
Unfortunately, Healing Brush fails to effectively heal areas that are too close to a sharp edge, such as the edge of a person’s head. You’ll get a smudged bleed that looks sloppy. The Clone Stamp Tool could be more appropriate in this situation; just change the brush hardness to reflect the transition.
-
Brush Settings
After going through two tools you can use to get rid of stray hairs, let’s look at some typical settings. For the best control and versatility, I use a Wacom tablet, but a mouse can also be used for this. Purchase a graphics tablet if you are retouching images without a Wacom. They begin at about $80 (USD) and are durable.
-
Clone Buffer
Typically use a circle at 100% Opacity as the default option. I can change the brush’s hardness, but it hardly never exceeds 80%. I use this brush in increments of 0%, 20%, 50%, and 80% because I’ve discovered that it meets the majority of my demands.
Sometimes I’ll use a different hardness setting, but I’ll decide which one to use based on the situation. With the pen tablet, I may modify the hardness setting more due to pen pressure.
As I already stated, I employ several Blending Modes as necessary. Very good cloning and a more efficient workflow are the results of properly matching these many variables to your circumstances.
-
Concealer Brush
You would likely hear a lot of advice to use a soft-edged brush. I’ll advise you to take the exact opposite action. Always keep the hardness at 100%. Additionally, alter your brush’s roundness (shape) to a little ellipse between 20 and 30%. Depending on my demands, I also tilt it and shift the orientation.
By requiring the Healing Brush to resample more frequently and randomly than a soft-edged circle, these parameters make it operate better. You don’t need a soft brush because the Healing Brush automatically applies the blend.
The results have been quite natural-looking, and the earlier-mentioned risk of fuzzy edges has been significantly decreased.
Finally, use a brush that is just a little bit bigger than the region you wish to repair, especially if there is loose hair close to someone’s head’s edge or if the background’s colour or brightness varies significantly.
Technique 3: Surface Blur
Although this method is largely independent of the other two, it does so for optimal effectiveness. With just one filter effect and some simple masking, you can quickly get rid of practically all stray hair.
Surface Blur, in contrast to Gaussian Blur and the other blurs, does not blur edges over the threshold value. When there is a noticeable change in hue and/or contrast, Surface Blur classifies that as an “edge”. Skin, clothing, and other little features will be smoothed out, but the edge of a person’s face or other details won’t be.
When you have a gradient background, Surface Blur works well to tidy up the edge of a hair where the Clone Stamp would struggle. It will be effective at maintaining gradations in tonality and sharp edges. When you have an image with a graded background, try it out.
Let’s go over how to remove hair from your photographs using Surface Blur.
Step 1 – Create a New Layer
To work without destroying the layer, drag it to the ” Create New Layer” icon (Cmd + J or Ctrl + J). To update the parameters without having to start over with the filter, you can convert this new layer to a Smart Object (Layer > Smart Objects > Convert to Smart Object). It’s not required to convert to a smart object.
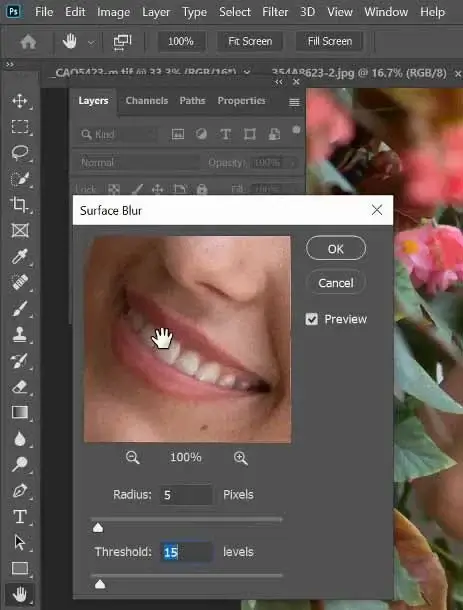
Step 2 – Apply Surface Blur
To use it, select Filter > Blur > Surface Blur. A preview of the effect in its current parameters will be displayed.
Radius and Threshold are the two settings on the Surface Blur filter. The blur’s strength or quantity is determined by the Radius. The limits for what the filter deems an “edge” is set by the threshold.
You’ll get a halo if you use the Radius too low or the Threshold too high. The sliders will need to be adjusted such that the main body of the hair and the sharp edges disappear due to blur, but the loose hair remains visible.
This will require some trial and error and vary from image to image. But I’ve discovered that a Radius of 40 pixels and a Threshold of 20 pixels produce fantastic results for me.
Apply the settings once you’ve gotten them reasonably close, then assess the outcomes. The majority or all of the lone hairs should be gone.
Step 3 – Cleaning the clone stamp
Surface Blur can be effective in some situations, but you’ll usually have to deal with a few stragglers. Clone Buffer those that escape by sampling extremely near the target area with a soft edge brush to prevent observable color differences. I try to maintain my brush hardness at or below 50%.
Avoid leaving your hairline too clean because that will make it appear unnatural. If you think your image may use a bit more overall polish, you can run Surface Blur again on lesser settings.
Step 4 – Create a Layer Mask
It’s time to simply use the effect on the outer hairline at this point. By selecting the “Create Layer Mask” button, you may add a layer mask to your layer that uses the Surface Blur. Using Cmd + I (Mac) or Ctrl + I, change the mask’s colour from white (visible) to black (invisible) (PC). This will mask the outcome.
In order to show the effect, paint the mask with white over the parts you want to erase using a hard-edged brush (approximately 80%). Because Surface Blur should preserve the edge of the main body of the hair, you don’t need to be particularly accurate.
Step 5 – Add Noise
In most cases, surface blur eliminates all noise(grain) from an image. Because it is overly smooth, this lack of roughness can destroy the effect. We must introduce noise in a dose that is consistent with the rest of the image.
By clicking on the layer’s thumbnail, make sure you’re working with the image of the Surface Blur layer and not the mask. Click on Filter > Noise > Add Noise.
On the Gaussian and Monochrome options in the Add Noise dialogue box. When the noise pattern and density are consistent with the rest of the image, adjust the slider. Even though it’s not quite essential, this tiny detail does a great job of camouflaging the changes you’ve made.
Conclusion
Sometimes having a stunning photograph can make loose hair incredibly unpleasant. Cloning and healing have several advantages but also some drawbacks. They can be used in conjunction with the Surface Blur technique to enhance retouching outcomes while also speeding up and simplifying either process when used separately.
After some practice, you should be able to swiftly assess an image and determine which of these procedures will remove loose hair the best. Never forgot to say thanks to Photos Editing Services experts for this helpful post.


