Eyes are the windows to the soul, they say. But what if you could change the view from those windows? With the magic of Photoshop, you can do just that! Changing eye color in Photoshop is a powerful tool for subtle enhancements and dramatic transformations. Imagine giving your portrait subject a touch of mystical allure with piercing emerald eyes or adding a touch of whimsy with playful rainbow irises. The possibilities are endless!
And the best part? It’s easier than you might think. This guide will walk you through the simple steps of changing eye color in Photoshop, from making precise selections to using adjustment layers for natural-looking results. So grab your favorite image and get ready to unleash your inner eye-color alchemist!
-
Why Photos Sometimes Need Eye Edits
Depending on the person in an image, many touch-ups must be made. For example, some photos need objects removed while others need eyes adjusted. If you care about your work and want to pursue a career in design, graphics, or photo editing, don’t miss the opportunity to learn photography. We’ll share some helpful Adobe Photoshop tips and keep showing you how it’s done!
Adjusting the camera, like the Dimensions, Exposure time, and ISO value, is essential for capturing what you want. When you view these photos on your computer, they might not be exactly how you want them. For example, maybe you’re not happy with how the photo turned out due to a technicality or don’t like the way your eyebrows look in the photo. If the gaze mirrors your soul, you want these photos to come out in the best possible way.
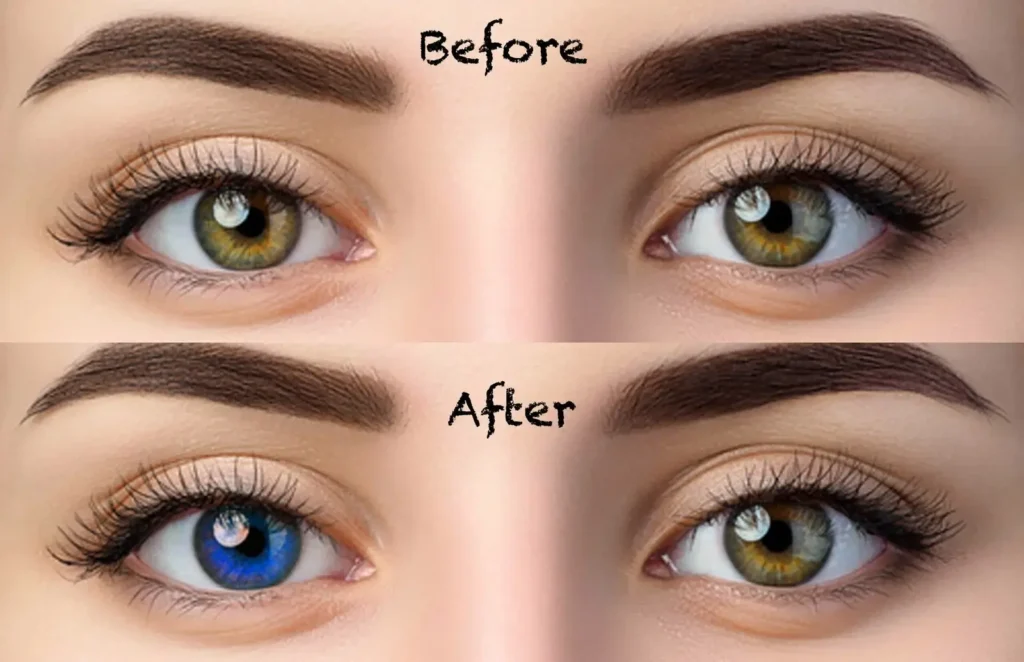
Changing the eye color in a photo can be due to several factors, such as highlighting small details of a person’s iris or changing the color completely. The changes can be made to have artistic effects, like making a white or orange eye point toward some supernatural being lurking in the photo.
Our expert photo editor will show you an effortless technique to change the color of the eyes of a photograph using Adobe Photoshop.
Video Tutorial:
Change Color of Eyes in Photoshop:
Changing the color of eyes in Photoshop is a common practice among photographers and digital artists to enhance the overall look of an image or create a specific desired effect. With the help of various tools and techniques available in Photoshop, you can quickly transform the eye color of your subject. Here’s a step-by-step guide on how to change eye color in Photoshop:
Step 1> Open Your Image:
To change the eye color in Photoshop, you must first open the image you want to work on. Launch Adobe Photoshop and go to “File” in the top menu bar, then select “Open” and navigate to the location where your image is saved. Click on the image file and hit “Open.”
Once your image is open in Photoshop, it’s a good idea to make a duplicate copy of the background layer. You can work on a separate layer and preserve the original image.
Step 2> Select the Eye Area:
Choose the “Elliptical Marquee Tool” and carefully select the area around the eye. Ensure you include the entire iris in your selection.
Step 3> Feather the Selection:
Go to “Select” in the menu, then “Modify,” and choose “Feather.” A feather radius of around 2-3 pixels is generally suitable for a natural look.
Step 4> Adjustment Layer:
An adjustment layer is a powerful tool in Photoshop that allows you to make non-destructive changes to your image. When it comes to changing eye color, using an adjustment layer is the best approach as it allows you to easily experiment with different colors and modify them at any time without damaging the original image.
Click on the “New Adjustment Layer” icon at the bottom of the Layers panel and select “Hue/Saturation.” This ensures non-destructive editing.
Step 5> Target the Blues:
Photoshop provides several tools and techniques to achieve the desired result, whether you want to enhance the existing blue eyes or transform them into a completely different shade. Adjust the hue slider to change the eye color. Move the slider towards the blue spectrum if you’re switching from brown to blue. Fine-tune saturation and lightness for a realistic appearance.
Step 6> Refine the Mask:
Once you have successfully selected the eyes using the Quick Selection Tool or any other desired selection method, it’s time to refine the mask to ensure that only the eye color is changed without affecting other parts of the image.
Select the layer mask on your adjustment layer. A soft brush to refine the mask ensures a smooth transition between the edited iris and the original eye area.
Step 7> Adjustment Layer for Brightness and Contrast:
Consider adding a “Brightness/Contrast” adjustment layer for added realism. This can help match the edited eye to the overall lighting conditions in the photo.
Step 8> Zoom and Fine-Tune:
Regarding altering eye color in Photoshop, two essential tools that can help you achieve the desired effect are the Zoom tool and the FineTune option. These tools allow you to focus on specific areas of the eyes and make precise adjustments, ensuring a natural-looking result.
Zoom in for a closer look and use the brush tool to make detailed adjustments. This step is crucial for achieving a seamless and natural eye color change.
Step 9> Repeat for the Other Eye:
Repeat the process for the second eye, ensuring consistency in color and adjustments.
Step 10> Final Touches:
Fine-tune your adjustments as needed. Consider adjusting overall image colors to ensure harmony with the modified eyes.
Step 11> Save Your Work:
Once satisfied with the changes, save your edited image.
Remember, subtlety is critical to achieving a realistic outcome. Experiment with different hues and tones to find the eye color that complements the overall aesthetic of your image.
Please comment if you have any inquiries regarding changing eye color in Photoshop or want to add something.


